CPU or GPU, which one’s for you?

When it comes to rendering, independent 3D studio Lacave Paris maximizes both to beautiful effect

When comparing CPU rendering and GPU rendering, it usually boils down to two things: quality and speed. Generally speaking, if photorealism and the absolute highest quality of final renders are what you are after, CPU is the way to go. When speed is the ultimate need, GPU it is.

But there’s also another important factor: software. There are 3D programs that can only render via CPU. There are others that render purely on GPU. And there are those that can render on either one (not both).

The same choice constantly faces Lacave Paris, a small independent 3D visualization and animation team in France. When you run a studio like theirs, one whose projects vary from visualizing interior design concepts to motion graphics to narrative animation, you have to be versatile with your rendering solutions. To achieve this versatility, Lacave Paris turns to not one but two rendering superfriends: GarageFarm.NET and Xesktop.

As a “small” 3D studio, it’s not cost-efficient for Lacave Paris to set up top-of-the-line spec’d machines for rendering and operate it in-house. So they turn to cloud rendering services GarageFarm and Xesktop for their rendering needs. Otherwise, they’d have plenty of irate clients.

Core team at Lacave
The core team at Lacave: Francois, Stephane M, Stephane B
 

Enter Render Farms

The difference between GarageFarm and Xesktop boils down to two things: render farm at scale (GarageFarm) and powerful remote GPU servers (Xesktop).

If you’re not familiar with cloud rendering services (also known as render farms), allow me to explain to you what they are. The short answer is: they are online services that let you connect your computer to multiple powerful, state-of-the-art servers and use these monster machines to do the rendering for you. Think of it like getting into a street fight and suddenly turning into The Hulk.

The longer answer is that all 3D artists know that rendering is a pain in one’s rear side. If you have any experience with 3D, you already know that rendering takes a lot of time. But perhaps you’re not exactly sure what really happens under the hood as you wait for that progress bar to complete.

Rendering 101

In a nutshell, rendering is the process of converting a three-dimensional object from your 3D software into a two-dimensional image that can be displayed properly by a laptop, mobile phone or TV screen. This 3D-to-2D conversion involves a lot of mathematical calculations that your computer’s CPU or GPU has to solve at warp speed, like a trillion math homework due every second. Now depending on your design’s complexity (scale, texture, lighting, shading, particles, etc.), rendering a single image can take hours. If you’re dealing with animation, the time needed for rendering goes up exponentially. Needless to say, it’s going to be hard to meet deadlines when you’re rendering just on your own computer.

That’s where an online render farm like GarageFarm.NET comes in. The render farm lets you connect to very powerful computers (called nodes) whose sole purpose is to render your 3D frames for you. Depending on your budget, you can access multiple nodes that allow you to render multiple frames simultaneously, seriously cutting down on render times. It’s like having an army of elite special forces at your fingertips. No rendering task is too big for this bada** machines.

Now some 3D software only renders on a computer’s GPU and is very specific. That’s where Xesktop comes in. Essentially, you get direct access to the nodes that house multiple powerful GPU cards. The added benefit of Xesktop is that you can run any 3D software on it and use a node just like your own computer but without taxing your own computer. You simply connect to Xesktop, where you get your own Windows desktop, install the software of your choice, and render away!

Lacave Paris’ journey

Now that you have a better understanding of cloud render farms and the rendering process, you can also better appreciate the challenges that Lacave Paris faced when they were starting out. Lacave Paris first started rendering their projects using GarageFarm. They landed on GarageFarm because when they were looking for a render farm to partner with, they realized that not all render farms support Modo, their 3D software of choice back then. The other render farm they looked at back then, unfortunately, ran into lots of trouble with character animation involving .mdd files. When they switched to GarageFarm, the issues were gone.

When Lacave Paris decided to switch to Octane Render (for faster renders), they realized they needed a new rendering solution since Octane isn’t available on GarageFarm, and it only renders using GPUs. Since they were very happy with their experience with GarageFarm, they chose GarageFarm’s GPU server rental service, Xesktop. The speed was incredible, and the 24-hour support was invaluable to the team at Lacave Paris.

“The experience was extremely positive,” Stephane Mordelet, director at Lacave Paris, said about Xesktop.

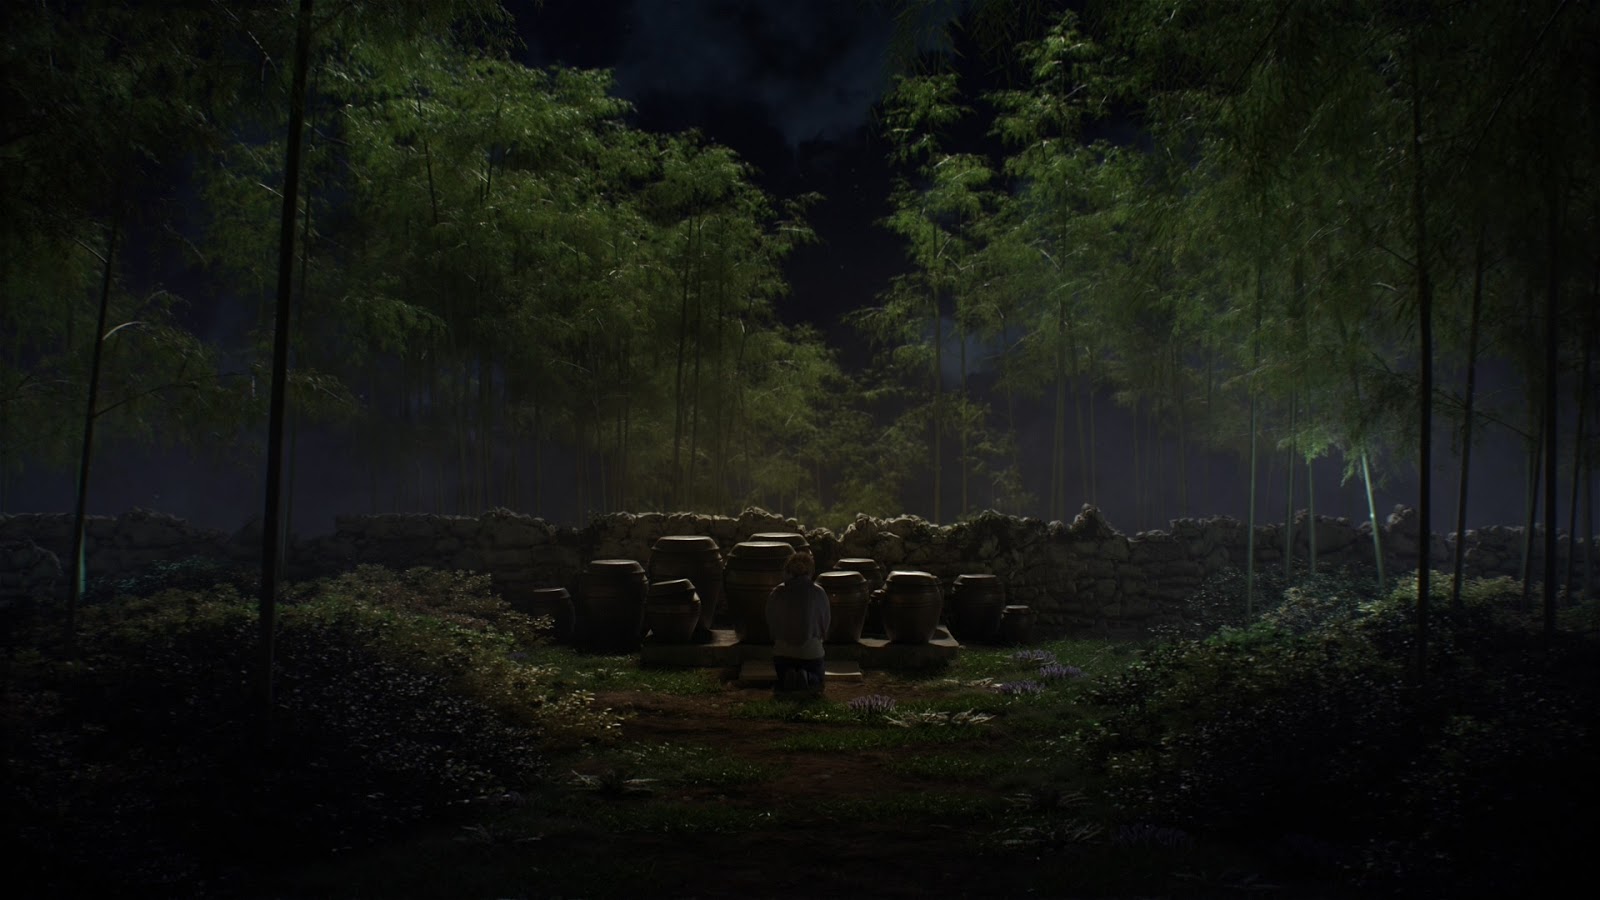
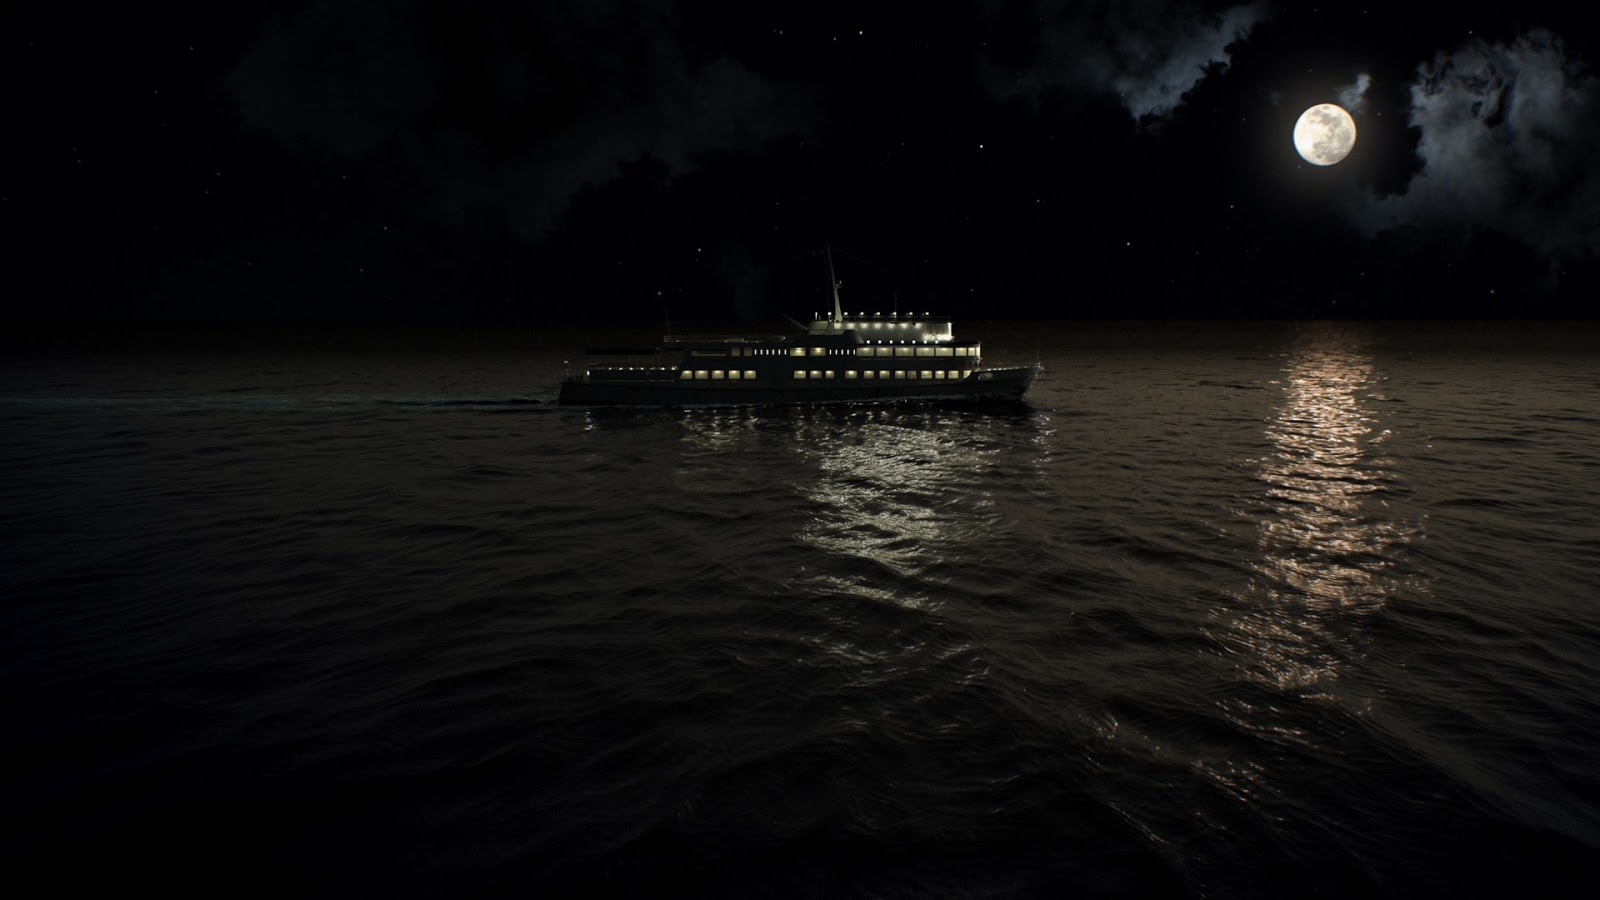
We’ve talked quite a bit about the work that Lacave Paris has done. For better appreciation, it’s best that you see their work for yourself. Here are a few:

Stepsol

A film for a startup’s commercial presentation, this short animation won awards for the client.

Art d’Arnould

This hybrid of live action footage and photorealistic 3D simply oozes class and sophistication.

Thales

The project required a lot of upstream work to storyboard and script defense scenes with vehicles and military equipment and model the various materials without plan or source files. The challenge was also in the delivery size of the file, a video file in 20,000/3,800 pixels that was then broadcast on a hemispherical screen!

Thales
Thales, Lacave Paris

As Lacave Paris works clearly show, excelling in one’s craft takes dedication. It also doesn’t hurt when you have powerful allies like GarageFarm and Xesktop. With these cloud render services, Lacave Paris are not only able to complete projects on time; they are even able to provide real-time updates to clients, something that wouldn’t be possible if they were rendering projects on their own machines. They get improved speed and improved quality on their finished renders, proving that faster rendering doesn’t have to come at the expense of render quality. Cloud render farms like GarageFarm and Xesktop have allowed Lacave Paris to get both.

No reason why you can’t, too.

If you are interested to learn more about cloud render farms, read more here and here.

Rentable Servers and Renderfarms – A guide for 3d artists

The story of 3d studio Haword, who harnessed the power of both to save time and costs

Rendering is the stage in Digital 3d production that we, as 3d artists and freelancers, both eagerly await and dread at the same time. The closest thing to light at the end of a long and arduous journey in the sub-terrains of an overly caffeinated mind could either be a release, or the glowing bait of an angler fish waiting to eat us alive! The outcome we get depends on the circumstances we find ourselves in during a project, the choices we make to ensure we meet our deadlines and deliver quality content. One of those big choices is how we handle rendering our frames. In today’s world, we have at our disposal Cloud Render Farms that allow us to upload our project files and have them render over a network of computers, at competitive rates.

I’ll wager you, reader, had your butt saved by a renderfarm at least once or twice in your career.
So has Haword.

Haword represents a studio from South Korea that specializes in Motion Graphics for various industries and was a returning client over at GarageFarm.NET render farm, but after switching over to a GPU render engine, was directed to Xesktop, our remote server rental service, which for a time, was our only solution for cloud GPU rendering. He realized that there were some things our rendering servers were able to do for him that would not have been conceivable within a render farm.

Shots from one of Haword’s recent projects

Haword has since used both services interchangeably, and like many of our other customers, is glad to have both options available for his rendering needs.

You may be wondering how renting a server could be a better idea than using a render farm, where your frames can render on their own machines simultaneously. With Haword’s case in point, there are quite a few reasons:

  1. Scenes can be rendered from GUI/ within the 3d program and can be managed as though one were rendering on his/her own computer, whereas in a render farm one would need to keep transferring files and talking to support. This is convenient, and in some cases, essential ( for example some plugins do not work when rendered via command line as in render farms).
  2. Users can replicate their personal work environment on the server and install/ customize what they want. In a render farm, they would only be able to work with what plugins, programs, and file structures supported by the farm. Haword has used some custom scripts on his scenes in the past as well.
  3. In some cases GPU rendering on a server can be faster. For example, if your scene takes a long to load, then every node from a render farm will load your scene to render a single frame. On a server, you load the scene once and the frames will render in succession.

As Haword puts it:

“I can install my software as I want, and operate it as comfortably as my own computer. Also, I can pause rendering, change it, or modify the file myself for urgent files. The CPU render farm is easy to render [with], but needs to be mechanically sprayed on the render machine right away, so if there is a problem while monitoring it, it has to stop immediately or modify only the necessary parts and render them right away. If there are mistakes in rendering, it’s hard to detect, and all of that naturally associates with cost. However, Xesktop is very good and convenient because I can install my programs in Xesktop as I want, stop rendering or change it for a while, and modify the thin file yourself in case of urgent files.”

These are attractive perks, as I’m sure you’ll agree, but there’s a reason render farms are still the norm. Servers are less automated than a renderfarm- it may take time to set up the server, but this only needs to be done once. Transferring licenses and seats for some apps and plugins can incur additional costs or take up a lot of time for some software.

For Haword, however, these downsides were of no importance at all. In his recent project, a promotional feature for Samsung TV, his team used Xesktop to render the majority of the frames and when some files were too memory intensive for GPU rendering, he offloaded them to GarageFarm.NET.

“Rendering used a combination of GarageFarm and Xesktop. I used it as a GPU until the middle and changed it to a CPU in the second half. I think I worked with the CPU for scenes where rendering is urgent or RAM problems occurred”.

In summary, Remote Server Rental Services like Xesktop are always good to have on the roster for those instances when the hands-off nature of renderfarms, no matter how great the support (as in GarageFarm.NET), actually proves detrimental to getting the job done.

Some scenarios for when renting a server is the better choice for your GPU rendering are as follows:

  1. Your software or workflow is highly customized.
  2. You need to be able to perform edits to the project as you’re rendering.
  3. Your scenes take a long to load.
  4. Your frames render within 10 minutes or so.
  5. You would rather troubleshoot issues with your scene yourself.

If you find yourself ticking any of the boxes for the items above, consider Xesktop! Not only do we have extremely competitive prices on the market, but we also offer 24/7 Live support and can actually help facilitate your transition from our render farm to our servers and vice-versa.

“I can run a renderer very freely. And I think the low rendering cost is a big advantage.”

Take it from Haword. Try remote server rental service!

If you want to learn more about what GPU render solutions are available, have a look at this.

About Xesktop:

Xesktop is a remote server rental service that offers powerful GPU servers in the cloud that can be accessed remotely and used in the comfort of your home or workspace.

You can create and configure as many server instances as you need and use them on demand at affordable hourly rates. Server instances that you created will be saved and can be accessed from within your user dashboard.

Our servers maximize the GPU capabilities of engines like FStorm, Octane, Redshift, Cycles, to name a few, and you can install and use any of the popular 3D software packages like Maya, Max, Cinema 4D, Lightwave, Blender, or Daz 3D. Our servers are also ideal for analytics programs for Data Science like Mathworks MATLAB, AccelerEyes ArrayFire, or HiPLAR for statistical computing. Here at Xesktop, we’ve got your parallel processing needs covered!

Meet Ceturtu, The World Builder

Director and VFX Artist Cesar Alejandro Turturro’s imagination comes alive through 3D

The year is 1982. High up in the Atlantic skies, two Argentine A4C Skyhawks intercept and harass two British Sea Harrier FRS1’s that were serving as the British Royal Navy’s eyes. But in a spectacular feat of aerial maneuver, the Harriers execute a turn that put them behind the Skyhawks instead. The prey becomes the predator. Meanwhile down below, three Argentine M-5 Daggers, each carrying 250-kilo bombs, fly low, almost kissing the dark swirling waters of the Atlantic, to avoid radar detection and get close enough to the British fleet and rain down fiery destruction…

This is a scene from one of the most important documentaries about the aviation industry produced in Latin America by the History Channel called Malvinas: La Guerra Desde El Aire. Not a single video camera was anywhere near the site of the 1982 Falklands War between Argentina and the UK, but armed with a wealth of film directing experience, and first hand interviews, Cesar Turturro or “Ceturtu” implemented his most powerful tool – his imagination – to bring to life a critical moment in modern world history that would otherwise be only remembered by the pilots and sailors that took part in them.

But you might say, “Hey, this isn’t world building. How can you say that Ceturtu is a world builder? World building is Star Wars, or Lord of the Rings, or Game of Thrones.”

Well dear reader, you are right. Ceturtu’s work with History Channel isn’t world building. Not yet. You see, his work with the History Channel gave him the skills he needed and the time to mature in order to create his masterpiece – Invasion 2040, a post-apocalyptic science fiction series where the Earth is invaded by extraterrestrials and the hope of humanity lies in AI androids. And that dear reader is definitely world building.

But that’s getting ahead of the story.

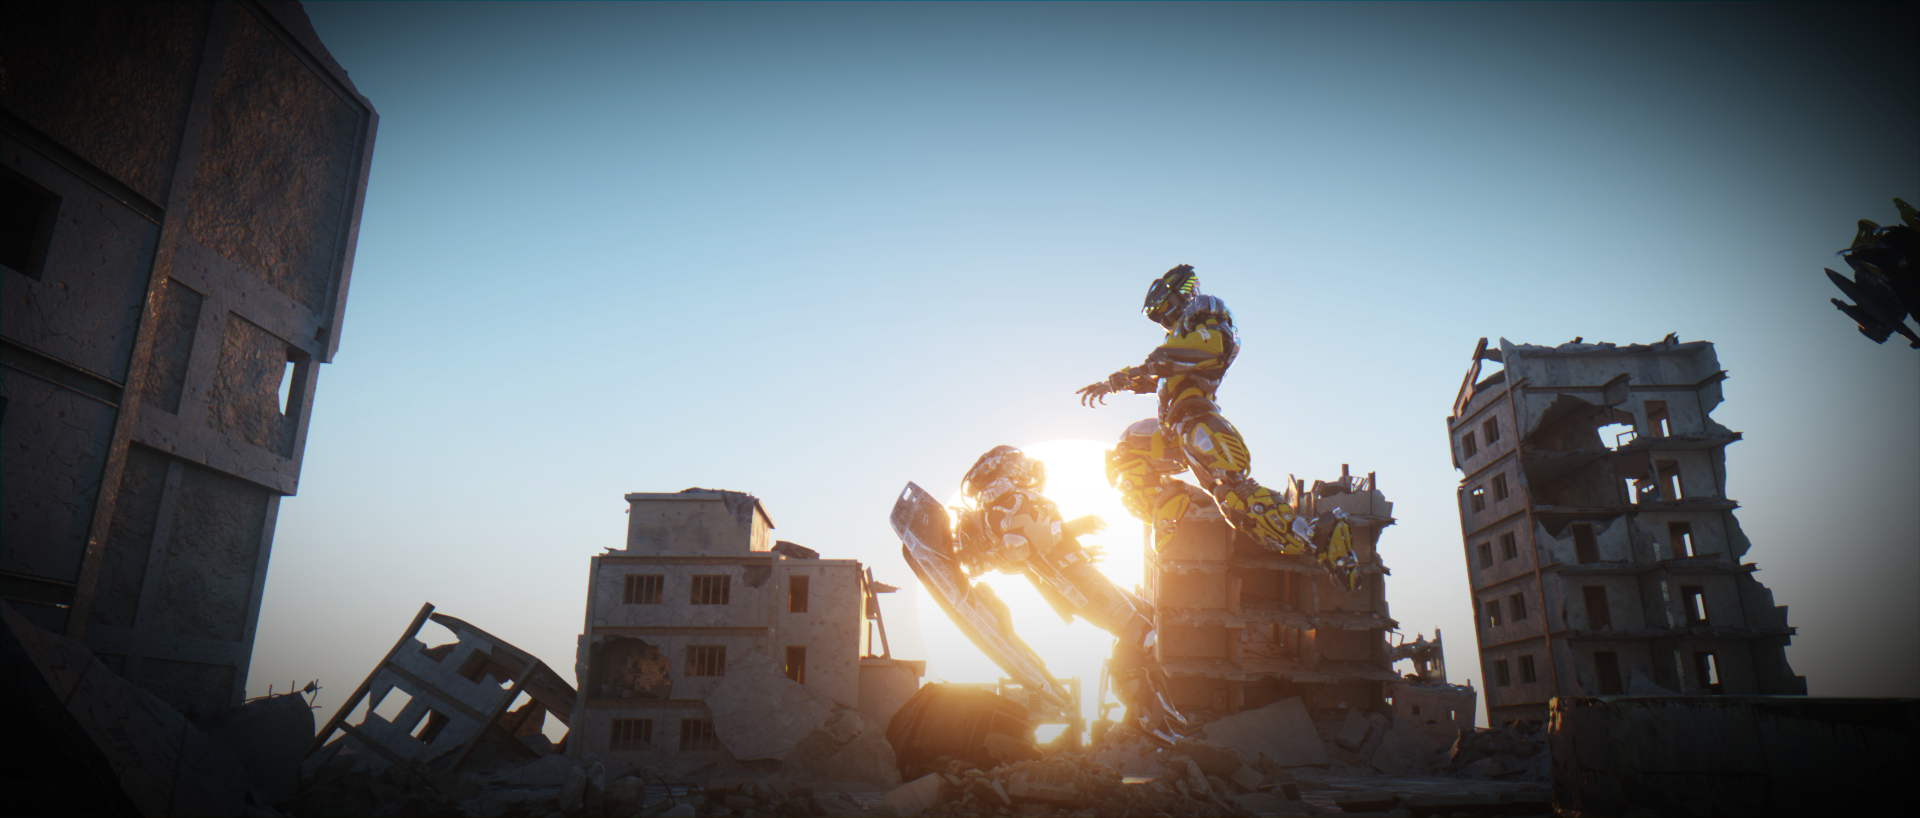
A frame from Invasion 2040

Imagining the end of the world as we don’t know it

Speaking of post-apocalyptic, Ceturtu’s earlier work for the Latin American version of History Channel’s Life After People, may be closer to the themes he, later on, develops in Invasion 2040. Back in 2008, this series imagined and visualized what could happen to our cities, buildings, and other structures if humans were to disappear off the face of the Earth. The documentaries feature interviews with physicists and engineers who trace the sequence of civilization’s decay, from the first day the Earth becomes human-free up to 10,000 years after we’re gone.

However, what made Life After People one of the most watched shows on History Channel were the visualizations that Ceturtu helped create. From grass overtaking Argentinian roads to wild vegetation reclaiming Peruvian buildings to the crashing of the Redentor Christ in Brazil, the Buenos Aires Obelisco and other landmarks of Latin America after centuries of disrepair, Ceturtu’s 3D renderings of things that have never happened (or is soon to come! Hello, global warming) kept people intrigued episode after episode.

Imagining non-human intelligent life

That kind of covers Ceturtu’s first encounter with the post-apocalyptic. Contacto Extraterrestre, another History Channel mini-series in 2013, introduced him to the possibility of extraterrestrial presence on Earth across history. And it tantalized him. The show investigated the most relevant UFO cases and sightings, interviewing experts and eyewitnesses in search of answers to the ultimate question of whether we are alone in the universe. Ceturtu supervised the VFX production for the show, leading him to imagine what extraterrestrial biology and interstellar travel-worthy spacecraft could be like.

Birth of his masterpiece

All these experiences converge and culminate in Ceturtu’s latest and soon-to-be-released (as of writing) work, Invasion 2040. If the multi award-winning prequel to it – Genesys One – is any indication, Invasion 2040 looks to be amazing alchemy of live action filmmaking, storytelling, world-building, and visual effects. Take a look at Genesys One for yourself.

If that didn’t excite you enough, here’s the trailer for Invasion 2040. It’s like Transformers meets the Last of Us.

The work behind the magic

Even for just a trailer like that, you can’t pull that off without being deep in film and 3D craft. Ceturtu has 20 combined years of working behind the camera and in front of a computer. He formed his own studio, CreaVision, in 2001 and started getting more involved in the 3D industry in 2011. His history with the History Channel Latin America gave him the opportunity to master rigging, texturing, animation, and rendering.

Android N35 from the movie Invasion 2040

And for a project as complex as Invasion 2040 and Genesys One, even a master like Ceturtu needed help. He turned to Xesktop. If you’ve watched the links above, you’d see how much detail goes into every frame, detail that would take really long to render without the help of a GPU rental service. Here’s how Ceturtu tells it:

“I sent some complex scenes where there was a lot of noise or volumetric stuff on it. Some characters in Invasion have a lot of reflections and detail. Or in other scenes, there are a lot of objects in huge scenarios. The aircraft must fly over thousands of meters. So you need it all over the scene. It’s impossible with my own GPU to get a very realistic and high quality scene with lots of volumetric cloud. All of it was rendered in a short time with Xesktop. Very practical.”

And as any 3D artist would know by experience, a lot of issues can crop up during rendering. Especially when you’re dealing with a huge number of frames. That’s why for Ceturtu, Xesktop’s real-time support was crucial:

“The good communication and the easy-to-use app were perfect. I got to send and receive the material with no problems. All issues were solved by the staff. Good compatibility with my software, good communication, good price… this is why I always recommend Xesktop.”

Ceturtu looks forward to new developments in 3D to inject more realism into his imagined worlds. Some of the new technology that can help him in his work are:

“Scanned models, high quality humans with realistic expressions–these will make a huge change in the filmmaking industry, allowing small productions to make very high quality scenes, where it would be impossible to do in real life (stunts, extras actors, film equipment, etc.)”

And for him, the future definitely includes GPU rendering:

“Today, big GPUs allow us to make the biggest simulation particles, realistic rendering, huge scenes, with a lot of models, trillions of polygons, you can illuminate, animate, watch in real time how your scene will look. This is priceless.”

There you have it. Watch out for the release of Ceturtu’s Invasion 2040. If you want to learn more about him and his work, click here.

Find out more about Xesktop and how it can help you in your 3D projects here.

How to choose the best server for your GPU rendering needs

So the time has come for you to leverage the ridiculous power of our GPU servers. You’re ready to fire up your DCC and experience it like never before on one of our remote workstations, and we’re just as excited as you are! But before you rent a gpu server, boot up and log in, there are a couple of configurations you can choose from. Either of our servers will likely do a good job, but if your projects are especially complex, read on to see which is the best GPU server for your needs!

Server type 1 – 1080Ti GPU server

  • GPU: 10x GTX 1080Ti, 11GB vRAM
  • CPU: 2x Intel Xeon E5 v4 8-core 3.0 GHz
  • RAM: 256 GB
  • NVLink: N/A
  • OctaneBench: 2,093
  • OS: Windows 10
  • 200 GB system drive
  • 500 GB storage drive
  • Price: $6 / per hour
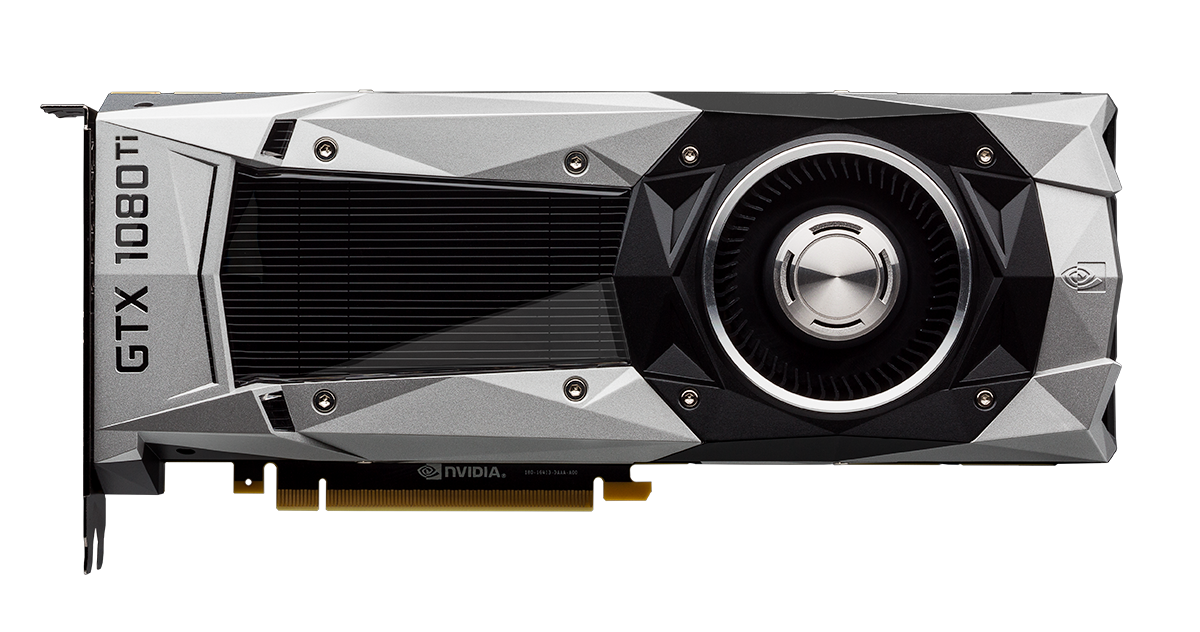
Nvidia GTX 1080Ti

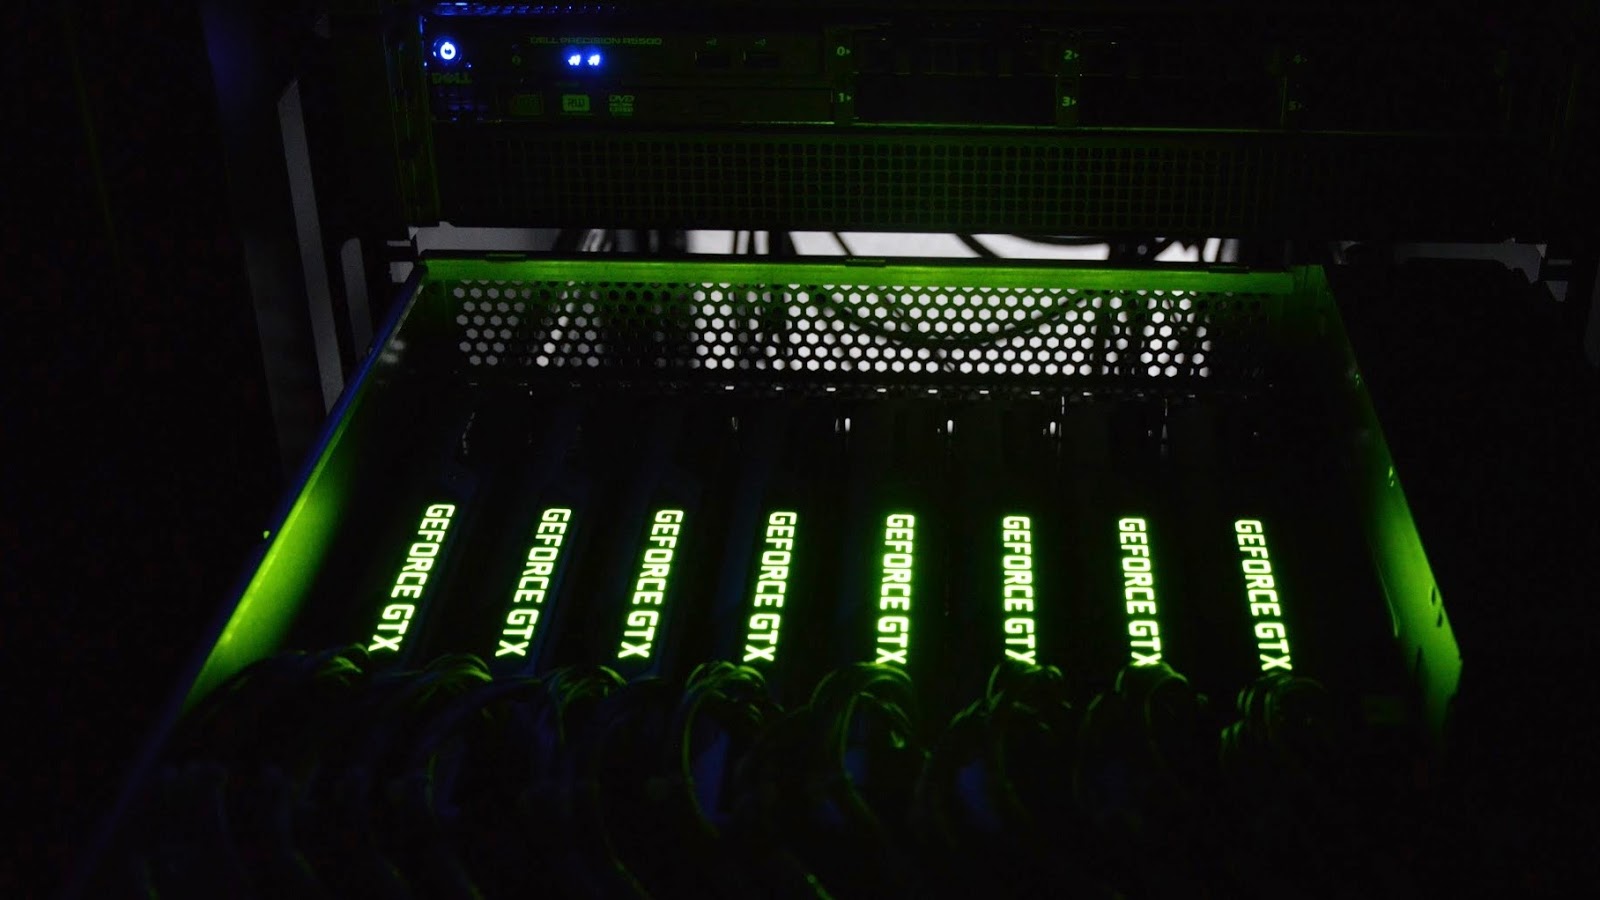
This was the first configuration we offered to our customers. This setup leverages Nvidia’s Geforce technology, which is derived from gaming systems and as such is effective for 3d rendering as well. With 10 GTX 1080 Ti cards, bucket and tile rendering scales at an almost linear level, and DCCs that can utilize CUDA cores benefit greatly from this server type. Additionally, you can run multiple instances of software without a hitch.

The rate for this server is an accessible 6 USD per hour, which may be, in some cases, more cost-efficient than using a gpu render farm.

So what are the use cases for this option?

  1. Your work style can be accommodated by the VRAM limit.

    – If you work on visualization, motion graphics, or simple character animations, 11 GB of VRAM is probably way more than you will need in a scene (assuming that you optimize your polycount and textures).

  2. Your software can utilize all 10 GPU cards

    – Some engines have a limit to the number of cards that can be used for 3d rendering. Check the features of your engine to ensure that you can leverage 10 cards at a time. If this isn’t the case, you could run multiple instances of your software to render multiple batches of frames at a time but managing the tradeoffs is up to you.

Server type 2 – V100 GPU server

  • GPU: 8x Tesla V100 16GB vRAM
  • CPU: 2x Intel Xeon E5 v4 10-core 3.2 GHz
  • RAM: 256 GB
  • NVLink: supported
  • OctaneBench: 3,037
  • OS: Windows 10
  • 200 GB system drive
  • 500 GB storage drive
  • Price: $8 / per hour
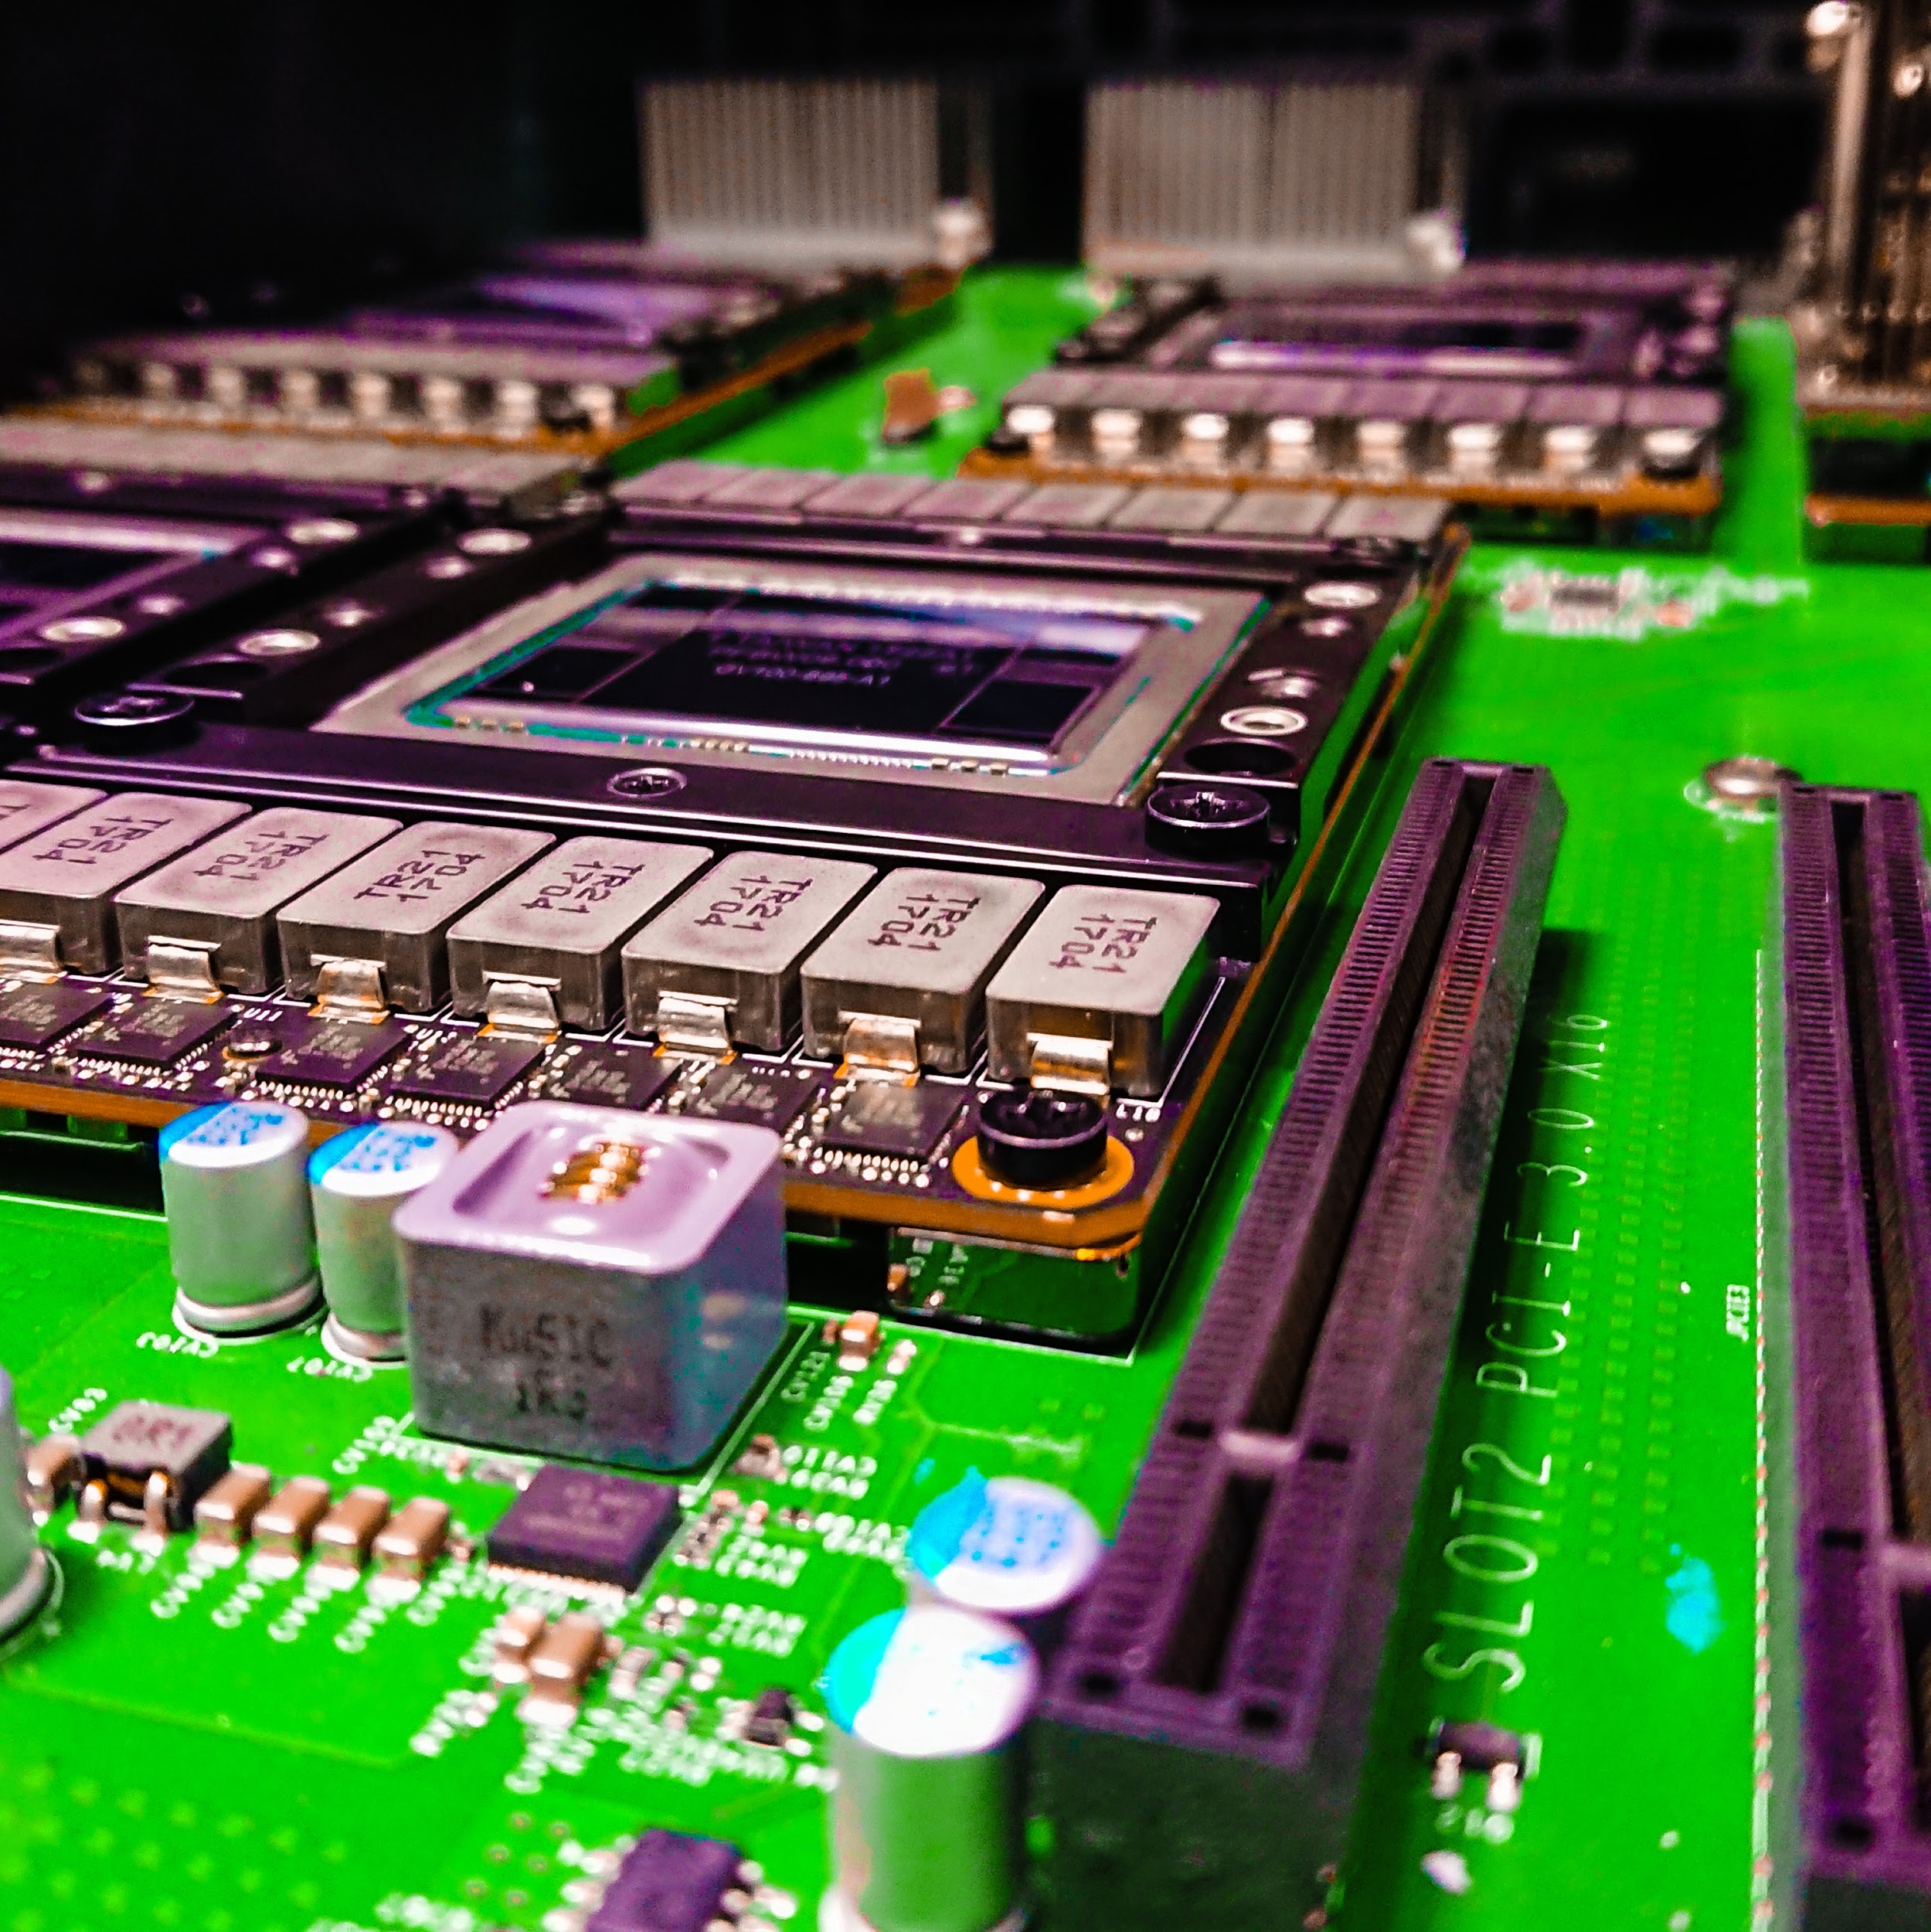
Tesla V100 motherboard

This server type is our upgraded addition to our GPU rental service, and while equipped with fewer cards, more than makes up for the difference with its power. This configuration features 8 Tesla V100 cards with 16 GB of VRAM built with the newer Volta microarchitecture dedicated to high-performance computing, lending itself very well to GPU rendering. Since many DCCs can only make use of up to 8 cards, this option promises more speed in processing any GPU-dependent tasks and can handle very complex 3d scenes, especially when out-of-core memory offloading isn’t feasible. The possibilities are nearly limitless for this setup, and CPU-dependent tasks also enjoy a bigger boost with the 10 core, 2x Intel Xeon E5 v4 with a 3.2 GHz clock speed.

The rate for this server is 8 USD per hour but will out-class Server 1 in terms of computational power.

Go for this server if:

  1. You’re training AI or performing other GPU based tasks.

    – This server sings when pitted against intensive GPU processing. Machine learning, simulations, and similar processes are a great chance for this configuration to really earn its keep.

  2. Your 3d projects are insanely complex.

    – If you deal with heavy simulations, volumetrics, unoptimized 3d scans, UDIM textures with no less than 4k resolution, or anything that would make even heftier workstations explode, then Server 2 is definitely the right choice for you.

  3. Your software’s Multi GPU support caps at 8 cards or less.

    – Some software may limit the number of GPU cards allottable within certain license types, which would make this server the more effective solution.

  4. You want to take advantage of all the VRAM you can.

    – Typically, the V-RAM available for each card does not stack in multi-GPU processing. This means that the card with the least amount of VRAM dictates the amount of VRAM available. However, this configuration supports NV-Link, which allows you to offload VRAM from one card to the other.

And that’s about it! In summary, while any project can benefit from our Servers, some situations may call for one over the other. These considerations may not absolutely warrant one choice over the other, so use this article as a guide when working with relatively complex scenes, and don’t hesitate to chat with our support team if you have any questions or need additional help.

About Xesktop:

Xesktop is a remote server rental service that offers powerful GPU servers in the cloud that can be accessed remotely and used in the comfort of your home or workspace.

You can create and configure as many server instances as you need and use them on demand at affordable hourly rates. Server instances that you created will be saved and can be accessed from within your user dashboard.
Our servers maximize the GPU capabilities of engines like FStorm, Octane, Redshift, Cycles, to name a few, and you can install and use any of the popular 3D software packages like Maya, Max, Cinema 4D, Lightwave, Blender, or Daz 3D. Our servers are also ideal for analytics programs for Data Science like Mathworks MATLAB, AccelerEyes ArrayFire, or HiPLAR for statistical computing. Here at Xesktop, we’ve got your parallel processing needs covered!

Powerful GPU Rendering With Octane

Powerful GPU Rendering With Octane

When it comes to 3D GPU rendering, Octane will always be on the top list. Despite being relatively new in the market, this rendering engine is highly regarded. It promises the speed and quality rendering that 3D artists are surely aiming for.

In this article, we’ll dive deeper into this GPU rendering engine, find out whether it lives up to its reputation as one of the best when it comes to unbiased rendering, and give you necessary points that could be valuable in deciding whether this product is worth a purchase. 

What is OctaneRender?

As per Otoy’s description, OctaneRender is the fastest unbiased GPU render engine capable of providing unparalleled quality and speed. In simple terms,  will allow you to create digital reality quickly and easily.

Also, OctaneRender is one of the pioneers of GPU rendering and is currently one of the leading GPU render engines. This is probably partly because the product can integrate with a wide array of plugins for digital content creation such as Modo, LightWave, Maya, and 3ds Max. Plus the platform is known for its user-friendliness. Even new 3D artists will be less likely to have a hard time working their way around the engine. OctaneRender enables its users to concentrate on the artistic side rather than the technical side of things.

OTOY OctaneRender 2020 Showcase
 
OTOY OctaneRender 2020 Showcase
 

OctaneRender’s Key Features

OctaneRender is feature-packed. In this article, however, we’ll only cover the functionalities that take the product apart from its competitors.

Fully GPU-based

OctaneRender leverages the power of the GPU. It claims to have the ability to quickly render final quality images, specifically 10 to 50 times faster than its CPU-based rendering engine counterpart. On top of that, the engine can scale nearly absolutely. It is capable of handling multiple GPUs. With every GPU added to your system, you can expect a boost in its performance.

Standalone Application

One of the features unique to OctaneRender is its standalone application. Of course, the platform still comes with add-on plugins.

With the standalone application, a scene will be imported to the platform from 3D modeling software. Once the scene is already on the standalone platform, you’ll have the freedom to adjust lightings and materials as you wish. To give you maximum interactivity, the rendering settings and render resolution are lower. When the scene is ready for final rendering, the platform boosts the resolution and increases the render settings. The rendering can be completed in a matter of minutes.

Octane’s standalone application can be a very useful tool because it gives you the opportunity to test a wide array of elements. 

Insanely Fast & Responsive Preview

OctaneRender’s preview window is probably the most impressive and responsive in the digital content space. Depending on the plug-in, you can get quick access to the focus point selection, material selection, and AOV or render layer preview. 

Material Library

OctaneRender comes with various materials which are easier to comprehend, making it ideal for new 3D artists. It also supports subsurface light scattering (SSS), chromatic dispersion, and complex IOR to name some, enabling artists to create the best materials possible. Artists can also create complicated materials using the platform’s node editor. Furthermore, this render engine supports toon shaders, metallic materials, and allows the import of complex PBR textures. 

Huge Octane Community

It is not a built-in feature but still worth mentioning as it can be of huge help in figuring out how to make the most of the engine. Octane’s Facebook group has over 30k members. There’s also an Octane community on Reddit and other forums so there’s a lot of channels where you can find valuable Octane-related information.

Supported Software

OctaneRender supports the following platforms:

  • Linux (64-bit)
  • Windows 7 or higher
  • macOS 10.13.6 High Sierra 

If you will be using Windows or Linux, you’ll need a recent NVIDIA driver while a CUDA runtime file is required for macOS.

Pricing

OctaneRender, given its power, isn’t cheap. The lowest price offered by its developer is over 600 Euro billed on an annual basis. Their pricing structure is a bit confusing. If you want to know more about the pricing details of this product, don’t be shy to visit their website. 

The Drawbacks

OctaneRender is undeniably powerful but it isn’t perfect, just like every other software out there. We won’t omit the drawbacks of the engine so you could make a deliberate decision.

We’ve mentioned that this engine requires NVIDIA GPU to work on Linux and Windows. It could be an issue for those who lack resources but it is not really a deal-breaker.

Also, since Octane is GPU-based and it uses VRAM video cards, it has limited storage capacity. This can lead to several issues, such as fewer polygons rendered in the scene and low quality of textures and solutions, like fur displacement and motion blur. In this case, you might want to use a more powerful engine like Nvidia to offload memory to RAM. 

If you have a tight budget, you can also try renting a GPU. Xesktop, a GPU rental service provider, offers powerful GPUs for rent at reasonable prices. It’s an ideal option for 3D artists who wish to cut the time they need to render their graphics but lack the funds to purchase the necessary equipment. 

So far, those are the only disadvantages of the engine. 

If you wish to know more about the product and know whether there are other cons, the vendor offers a free trial. It is also a great opportunity to see whether the product suits your preferences before you make a purchase.

OctaneRender Vs. Other GPU Rendering Engines

OctaneRender isn’t the only GPU rendering product in the market these days. There’s Redshift, VRay, and Arnold to mention some. 

Each of them has its respective strengths and weaknesses. But if you are looking for quick, quality results, OctaneRender is a go-to. 

Generally, the best will still depend on your preferences. But one thing is for sure – Octane is definitely a powerful GPU rendering engine. And it is worth a try. Besides, it offers a free trial so you can see things for yourself without risks involved. 

GPU rendering throwdown: Which software is the best?

Okay, a confession: that title may have struck you as a little bit of a clickbait. It may have got you thinking, “there can’t possibly be one objectively ‘best’ rendering engine out there, is there?”

Or isn’t there? That’s what we hope to help you find out.

Of course, the ultimate judge of what’s best will be you. The idea of “best” depends on your needs, your project, your process. There simply isn’t a one-software-fits-all solution, since there are a lot of different factors to consider, and they differ from one 3D artist to the next. In short, different strokes for different folks.

It’s kind of like…cars. All cars get you from point A to point B (or at least they should), but how the vehicle does so varies greatly, and what’s “best” is determined by what you’re looking for. A muscle car gets you to your destination as well as a subcompact but a subcompact is easier to park and guzzles less gas. An SUV gets you to your destination as well as a pickup but a pickup lets you bring oversize loads. 

Okay…maybe I lost you there. Let’s stick to the topic, shall we?

The whole point of that car metaphor was simply to show that there are many things to consider when deciding which 3D rendering software is best for you. For many 3D artists, the main factors are speed, look, and versatility. Under versatility falls the software’s ability to make use of your graphics processing unit (GPU for short, also commonly called graphics card) when doing your renders. This deserves a bit more explanation and some definition of terms.

What is GPU 3D rendering?

GPU 3D rendering simply means that the rendering process is performed by your computer’s graphics card as opposed to the CPU. And why would you want that? Because in most cases, rendering using your GPU or (GPUs) is much faster. 

But before we go any further, let’s first refresh our minds on what 3D rendering is, so that all these can make more sense.


The 3D Process

3D rendering is the last step in the process of creating 3D graphics, where we take completed (but bland and raw) 3D models and make them look awesome. Now a lot goes into that one word, awesome. You see, 3D modeling is like working with clay. You start with a mound of clay (usually you start with a basic shape, like a sphere) which you then sculpt, trim, pull, twist, and manipulate in all sorts of ways inside the 3D modeling program to come up with, say, Iron Man. Your 3D model of Iron Man may have all the plates and grooves and layers of his armor but it still just looks like gray clay. To turn this sculpted clay into a photo-realistic Iron Man, you need to take a few more steps:

Texturing. This is the part where the software sort of “tags” every part of the surface of our 3D-modelled Iron Man. Usually, you’ll need a separate texturing program for this. This “tagging” produces a map of your 3D model which is then plugged into a Material or Shader. The shader is the 3D world’s term for describing what kind of surface your 3D model has for example: is it wooden? Metallic? Glass?)

Lighting. Now that you have a UV-mapped model, you can now situate it in an environment, paint it, give it metallic properties, and apply all sorts of effects. One of the most important aspects here is lighting. Different rendering software have different ways of calculating light which affect how your finished product looks.

Rendering. Now, let’s say you are already happy with how your Iron Man looks. It’s now time to convert your 3D image into a format that can be displayed properly and consistently on the 2D screens of people’s laptops, mobiles, and tablets. Technically speaking, this step is the actual rendering step. Your computer has to solve gajillions of mathematical calculations in order to tell each 2D pixel on your screen what part and with what property (color, light, shading, etc.) of the original 3D image to display. These calculations are handled primarily by your computer’s CPU. It’s very taxing and therefore takes a lot of time. To cut this time down, many 3D rendering software lets your GPUs do the job instead of the CPU. This way, it’s faster and you can actually meet your deadlines.

Now that we’re all acquainted with the 3D process, let the throwdown begin!

*Before we dive in, just a quick note: the pros and cons detailed here are best taken with a grain of salt, of course. Again, your personal experience of the software will still be the final arbiter. Take this article as a starting point. Developing your own pros and cons as you take different renderers for a spin is best.*


Redshift logo

Redshift

Redshift is well-known for its speed and film production-focused features. 

Pro

Fast. With Redshift being GPU-based plus using biased rendering (if you don’t know biased or unbiased rendering is, learn more here), this software is perhaps the fastest to churn out renders.

Fully-packed with features. Redshift is geared towards creation of 3D environments. You won’t run out of tools to bring to screen what you imagine (ooh, rhyme!).

Huge user community. If you’re a beginner or even an advanced designer in need of some tips and tricks, you got a large network of Redshift users to turn to.

Cons

Clunky plugins. The interface of its plugin, particularly for Cinema4D, may not be the simplest to use. Heck, it can even be annoying at times.

Quirky. This is still related to Redshift plugin’s less-than-stellar UX/UI. Getting to an effect or making it do what you want to do can sometimes require more clicks than you expect. 

More effort. Achieving life-like results with Redshift is definitely possible, but it has been the experience of expert designers that getting to a photorealistic finish requires a lot of effort with Redshift. But hey, again, it’s fast.

Compatibility. Redshift was originally made for PC and Nvidia GPUs. A beta has been released for Mac but it’s still on “public beta” stage. AMD GPUs are also now supported if you’re running macOS BigSur (11.0) or later.

Octane Render
 

Octane Render logo


Good speed and great look have been the calling card of Octane renderer. 

Pros

Fast. Speed will always be a factor for designers meeting deadlines and Octane delivers on this front. Perhaps the fastest renderer out there today.

Beautiful renders. It’s hard to make something look bad using Octane. Its unbiased rendering yields output that simply looks stunning.

Innovative features. If you’re excited for new tools and technology in rendering software, Octane may be in the best position to make those happen with their Elon Musk-ish CEO, Jules Urbach.

Big user base. Similar to Redshift, numerous artists and studios use Octane. You will not lack in crowdsourced advice and hacks in using Octane.

Compatibility.  Originally only available on PC with Nvidia GPUs, Octane was made compatible with (in fact rebuilt for) Apple in 2019 and can now be run on AMD Vega and Navi GPUs.

Cons

Stability. Being the most innovative renderer may come at a cost–crash prone-ness.

Not ideal for feature projects. If you’re working on film productions or similar large projects, maybe Octane isn’t the way to go. Production types find its tool set rather limiting.

Quirks. GPU renderers will simply have their own set of quirks and Octane isn’t immune to this. But many designers choose to live with its quirks for the beautiful look that can be achieved in Octane.

Arnold

Autodesk Arnold logo

Arnold is well-known among film 3D designers for its top-notch quality. Arnold is the built-in renderer for Autodesk 3D applications.

Pros

Versatility in rendering. Unlike Redshift and Octane which are both purely GPU renderers, Arnold has both CPU and GPU versions.

Robust features, simple interface. This renderer is replete with tools for achieving the look that you want and they’re all a delight to use with what may be the most user-friendly plugin. With Arnold, there are fewer controls to tweak for the effect you want. It’s a pleasure to use.

Stunning output. Quality and beauty are Arnold’s calling card. These are the main reasons Arnold has been the go-to renderer of the film industry for more than a decade now

Cons

Compatibility. While Arnold runs on both PC and Mac, it only works with Nvidia GPUs. 

Speed. Arnold is not the fastest renderer but it just might be the most beautiful. However, if your need for speed is paramount, maybe Arnold isn’t the way to go.

Licensing. Obtaining a license for Arnold and getting it set up is more complicated than it needs to be. This needs work from their end.

V-Ray

Chaos V-Ray logo


V-Ray is the architectural visualizer’s (ArchViz) go-to renderer. It is ideal for virtual walkthroughs

Pros

Versatility.  Just like Arnold, you can render on both GPU or CPU in V-Ray.

Realism. V-Ray’s physically-based approach to rendering allows users to achieve photorealistic looks.

Materials library. A good selection of quality material makes it easy to produce convincing life-like objects.

Tweakability. V-Ray rewards those who take time to learn the settings and controls with improved realism.

Cons

Lighting. While you can definitely achieve amazing lighting with V-Ray, it’s not as straightforward to do and may sometimes be confusing to set up.

Materials library. I know, we did say this was a pro but many designers also feel like V-Ray can be improved by having more materials. In particular, designers want better, um, fur.

User interface. V-Ray’s depth of controls and settings has a steep learning curve. Not for the faint of heart, nor the impatient, nor beginners.


Cycles

This free, open-source and node-based renderer is highly–and increasingly–popular.

Pros

Free. It’s free! It comes free with Blender. Have we said it’s free? It’s free.

Quick updates. Because Cycles is open-source, it can integrate new stuff like advanced shaders and new rendering techniques (usually) faster than other render engines.

Versatile AF. It’s the first entry in our list that you can run on PC or Mac, with Nvidia or AMD cards at the get-go. Whaaaat? Yes, it’s true. AND…Cycles can seamlessly switch between CPU and GPU rendering.

Cinema 4D and X-Particles integration. Cycles has a plugin for Cinema 4D called Cycles 4D that lets you access Cycles directly from Cinema 4D. If you intend to do some particle work, then the built-in support for X-Particles is a godsend.

Cons

It’s node-based. If you hate working with nodes, stay away.

Speed. It’s not the fastest renderer around.

Limited rendering algorithms. Currently, only path tracing is available.

LuxCoreRender


LuxCoreRender logo


Another favorite of the archviz crowd. It’s physically-based, it’s unbiased, it’s free.

Pros

Free. Yep, enough said.

Great with caustics. Caustics has to do with how light is reflected on different surfaces. LuxCore handles that very well, making it very much suited to interior work.

Versatile. LuxCore can render either via CPU or GPU.

Cons

Buggy outside of Blender. LuxCoreRender is compatible with lots of modelers but it’s not equally stable on all of them.

Hair. If you work with characters who have hair or surfaces that have hair-like features, LuxCore isn’t the way to go.

UX/UI. Not easiest to use nor is it the most user-friendly.

Maxwell


Maxwell logo


A purely unbiased rendering software best suited for architectural visualizations.

Pros

Beauty and realism. Legendary realism. If you mistake a Maxwell render for an actual digital photo, you wouldn’t be the first one. Maxwell outputs are absolutely gorgeous.

Ease of use. Maxwell uses real-life units of measurements, making it easier to learn. It also offers lots of ready-to-use light assets that look great, saving you lots of time and letting you focus on the creative part of 3D design. It’s very easy to set up scenes. Controlling the lighting is very intuitive.

Realistic camera model. Maxwell uses photography settings like ISO and shutter speed to further help you achieve a deeply photorealistic finish.

Cons

Slow. All that fantastic realism comes at a cost, and the cost is speed. Maxwell is perhaps the slowest renderer. But if you got time to wait, oh boy, does it look great.

GPU rendering. The ability to render using the GPU was added back in 2016 but switching from CPU to GPU isn’t seamless in Maxwell. You’ll have to tweak a lot of settings to get similar output and they still won’t be identical. For example, transparencies won’t have the same density, and caustics in refraction are not calculated. Oof.

Cloud rendering. Only CPU rendering is supported by Maxwell’s cloud rendering farm.

Radeon ProRender

While this software was created to cater to AMD GPU users, it also supports Nvidia cards.

Pros

Versatile. Radeon ProRender can run both CPU and GPU rendering, and as mentioned, works with either AMD or Nvidia graphics cards.

Free. That means your extra cash can go on improving your hardware.

AI denoiser. This results in faster render times. Instead of letting, say, a ray trace render to resolve naturally with hundred or thousands of passes to remove the noise, a machine learning algorithm kicks in to denoise the image.

Heterogenous. This means you can use your CPU and GPU to render at the same time. For best results, a multi-core CPU is recommended and multiple GPUs.

Cons

Look. Radeon ProRender isn’t ideal for interior work and it struggles particularly with…particles.

Beginner-friendly. Why is this a con? Well, if it’s beginner-friendly that means pros won’t find it deep and sophisticated enough for those high-level photorealistic outputs.

Lumion

Lumion logo

This renderer was designed to integrate with CAD, making it suitable for arch viz 

Pros

Speed. You can set up your scene quickly and Lumion churns out a good-looking render fast.

Great for exteriors. Lumion offers a wide selection of skies, water, grass, materials, plants, people, trees, and other things that are ready to use. Lumion also comes with preloaded environment maps onto which you can just drop in your building model.

Easy to learn. Lumion’s controls are intuitive and its interface is simple. You don’t need in-depth 3D knowledge to get a good render out of Lumion.

Cons

Cartoonish look. Some of the ready-to-use assets mentioned above tend to have a cartoonish look upon rendering. You’ll need to go through them to find out which ones look realistic and which ones don’t.

Price. Getting Lumion 11 will set you back at least 500 euros. If you want to spring for the Pro version, that’s 1500 euros.

KeyShot

KeyShot logo


This renderer is known for its real-time rendering capability

Pros

Ease of use. Keyshot’s unique selling proposition is that it has the simplest designing experience for 3D artists. And it delivers.

Speed. While you set up your scenes, lighting, camera, Keyshot continually updates your image. It’s perfect for concept designers who need to bang out ideas quickly and present it–from character design to vehicles to set design concepts.

Beginner-friendly. Keyshot is perhaps the most user-friendly of the renderers. Just import your 3D model, give it texture, color it, then light it accurately within a ready-to-use background. As you make changes, you also see the changes applied right away.

Cons

Price. The cheapest license is for Keyshot HD at USD995. 

Size of render. Keyshot isn’t the best at working with larger scenes.

Not for animation. Keyshot excels in stills and smaller scenes. If you’re working on a film, this may not be the renderer to go with.

So there we have it: a rundown of the 10 of the most popular GPU rendering software around. Of course, these aren’t the only ones out there. Here are some more programs that are worth checking out too:

  • Unreal Engine
  • Iray
  • FurryBall 
  • Thea Render 
  • Enscape 
  • Indigo Renderer 
  • Cebas FinalRender 
  • Solidworks Visualize
  • Clarisse 
  • Marmoset Toolbag

Now, if you’re serious about 3D but you don’t have the machine yet that can match your seriousness, don’t worry. Some of the companies who created this rendering software mentioned also offer cloud rendering services. What that means is that for a fee (yes, it’s pay-per-render but the fee is definitely way more affordable than upgrading your GPU or motherboard) you can send them your project and have their badass supermachines do the rendering for you. 

However, not all of those render engines offer cloud rendering services. If that’s the issue you’re encountering, we’re right here for you. If you’re running with popular engines like Cycles and Redshift, you can check our cloud rendering farm here or you can opt for our GPU Server Rental Xesktop, which offers cloud-based remote GPU rendering service for any rendering software. If you want to know how a cloud GPU server can help you, check this out. 

That’s it! I hope this helps you out in your 3D journey. Happy rendering!

A guide to GPU server rentals for 3D artists

As a 3D artist, you probably have already experienced waiting for hours just to render your creative project. If you are using a low-end device, rendering a still image may even take a whole day to finish. It can be a headache especially if you are on a tight deadline or just have tons of animations in line for post-production.

Not only is rendering time-consuming, but it is also resource-intensive. It demands multiple computer components, including your graphics card, your hard drive, RAM, and the 3D software to operate in unison. The quality of the aforementioned components also matters. If your graphics card is low end or your RAM does not have sufficient capacity, you won’t be able to render your work at a high speed.

But you are probably already aware of all of these things, and chances are you found your way here because you do not have a high-powered graphics-processing unit (GPU) capable of rendering your 3D works seamlessly. Also, you may have landed on this post because you want to know more about GPU server rentals and you’re considering hiring a server rental service to ditch your underpowered GPU.

In this seven-minute read, we’ll talk about everything you need to know about server rentals—what a GPU Server Rental is, who should use it, and when should you use it.

What is GPU Rental?

In its simplest definition, a GPU rental means offering a server in the cloud for rent. Since the server is in the cloud, you can connect to and use it remotely. It allows you to have a powerful workstation without actually having an actual GPU server at your workplace.

A GPU server rental can be used by different professionals for various purposes. Since it is in the cloud and accessible anywhere, it can be used for collaborating with teams from opposite ends of the world. It can also be used by businesses that deal with massive overhead on hardware and need to constantly upgrade their system, as well as creative professionals including 3D artists whose hardware cannot keep up with their project requirements to mention some.

Usually, the dedicated server comes with a high-end GPU and other specifications, such as high RAM memory. With a high-end machine, GPU server rental is a good option if you need to finish rendering a 3D work quickly, have large projects, or unexpected tight deadlines but do not have the right device to get the job done nor the resources to buy a new one.

Unlike building your own personal computer or upgrading your existing hardware, which is one of the options to speed up rendering (and costly), renting a GPU server gives you more for less. You can enjoy a high-end, up-to-date machine and experience fast and seamless 3D GPU rendering even if your local computer is a bit outdated or has low specs.

You do have to pay the cost of rent, but it costs way less than buying your own computer with high specifications. For instance, if you want to get the best of the GPU cards which is currently the GeForce GTX 1080 Ti, you would need to invest hundreds of dollars. If you upgrade every individual hardware part of your computer such as the RAM, you would have to prepare a hefty amount.

GPU server with GTX 1080Ti

On the other hand, with a GPU server rental, you can have them for a fraction of the price. For instance, Xesktop, one of the leading GPU server rental providers, only charges $6 to $8 per hour. It offers powerful servers that can be equipped with either of two specifications:

Server 1. specs

  • 10x GTX 1080Ti 11GB vRAM
  • CPU: 2x Intel Xeon E5 v4 8-core 3.0 GHz
  • RAM: 256 GB
  • OctaneBench: 2,093

Serve 2 specs

  • 8x Tesla P100 16GB vRAM
  • CPU: 2x Intel Xeon E5 v4 10-core 3.2 GHz
  • RAM: 256 GB
  • OctaneBench: 2,055

Server 3 specs

  • 8x Tesla V100 16GB vRAM
  • CPU: 2x Intel Xeon E5 v4 10-core 3.2 GHz
  • RAM: 256 GB

At this rate, you can rent and use as many powerful GPUs as you need or want. Xesktop also offers helpful guides to help 3D artists find the best 3D rendering solutions.

If you are to build a personal computer with the aforementioned specifications, it will cost you thousands of dollars.

You might think that building your own computer would be less expensive than renting one in the long run. Fair enough. But would you still wait to acquire a huge sum of money before being able to render your 3D works quickly? On top of that, it is hard to acquire the latest graphics card or CPU considering how fast these components develop.

Aside from cost-efficiency, a GPU server rental is also known for its unparalleled speed. You can get access to high-end graphic cards which can give you a substantial rendering speed boost.

How to Use GPU Servers Rental?

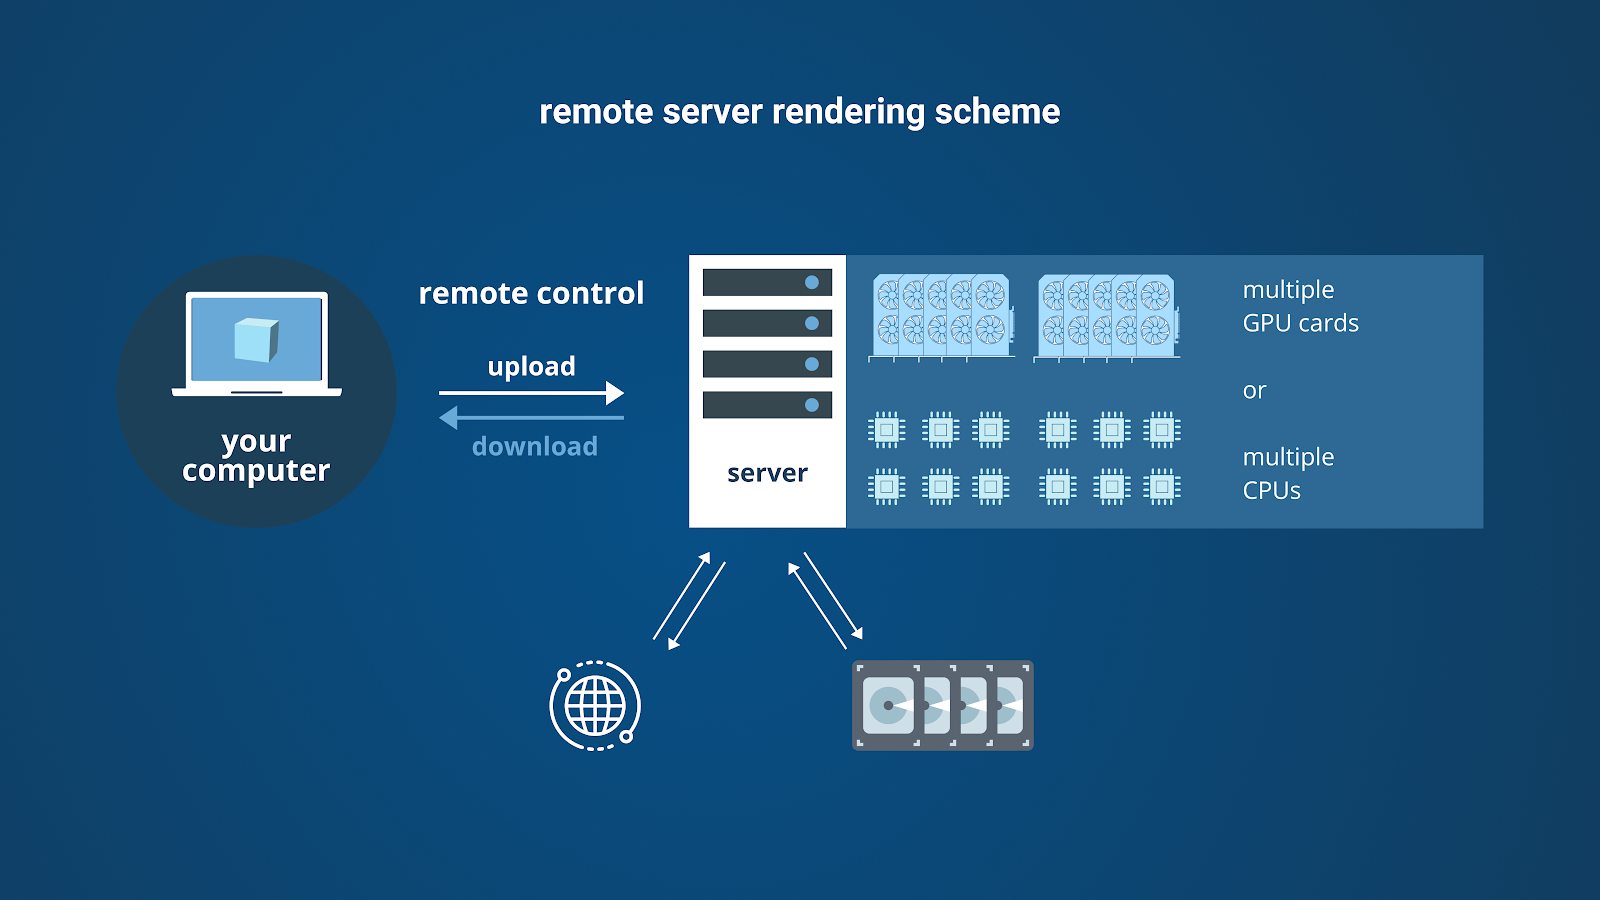
It’s simple. Xesktop, for instance, lets you create an account, log in to their web dashboard, choose the machine you want to use, and get the necessary credentials to get started. Getting started is typically a walk in the park. And if there are certain things you do not understand, they have a support team who offers help.

Once you’re done, you’ll get a blank desktop that you can use as your own local computer. It gives you full control of what tools or software to install. In terms of 3D software, Xesktop supports most of the commonly used platforms such as Cinema 4D, Maya, 3ds Max, Lightwave, Daz 3D, and Blender.

Afterward, you can start transferring your files from and to the server using cloud drivers such as Google Drive, third-party File Transfer Protocol (FTP) services, or by copying directly through Remote Desktop Protocol (RDP).

remote server rendering scheme

How Do GPU Rental Servers Differ from Render Farms

In terms of rendering 3D graphics, you probably have already come across the word “render farms”. It’s not surprising since this service has been around for more than a decade and is considered as one of the ideal solutions when it comes to rendering. Well, there is a good reason behind it.

A render farm consists of various high-end computers linked with each other to make rendering fast, seamless, and less of a headache. They are mostly automated systems. All you have to do is send the source file to the render farm and the farm software will distribute your file to various computers on its network. The connected computers will then perform every stage of the rendering process simultaneously. They will do the heavy lifting, and even give you the final product quickly.

So if a render farm does a great job at rendering your 3D works, why should you still consider leasing a GPU server?

Well, GPU server rentals offer something that isn’t available in render farms – flexibility. The service gives you access to a blank system. You may still need to do all those mundane tasks such as installing a render engine and 3D software, but it also means you get the opportunity to make adjustments to your files and render directly from your DCC GUI from within a rented server. It will allow you to identify issues immediately. No need to reach out to the technical support of your chosen server rental service provider to discuss issues. But in case the need for assistance arises, server rental service providers like Xesktop still provide 24/7 live support.

Additionally, GPU server rentals give you improved control over your projects at the fraction of the cost of hiring an in-house team. It also allows you to work on a high-powered machine on the go, seamlessly carry outside tasks such as caching and baking, and solves the dreaded long queue problem with render farms.

Should You Use GPU Server Rental?

The answer will depend on your preferences, requirements, and purpose.

If you are a 3D artist who wants full control over the rendering process, then you will undoubtedly benefit from renting a GPU dedicated server. You will be the one to do everything. The GPU rental service will only lease GPU.

GPU server rental is also an option if you have a high clientele and are working on high-end animations and motion graphics so you need access to a huge GPU rendering power. Or if you are just fed up waiting hours after hours for the rendering to finish.

But if you don’t like working on the technical aspects, such as installing each and every software required for post-production of your 3D works, the render farm will suit your requirements better. You don’t have to do anything but wait until the rendering of all your submitted source files is finished. It’s convenient.

What’s Next?

In today’s digital world, cloud computing is becoming the new norm. It has allowed us to do things in a faster and more scalable way with more efficiency but fewer costs. This same technology has made it possible to make the typically time-consuming rendering of 3D graphics faster through the GPU rent cloud. It gives 3D artists the processing power they require to finish high caliber works and meet even the most intense, last-minute deadlines. On top of that, you only pay for what you use.

GPU server rental services, like Xesktop, are a powerful tool for 3D artists. It lets you have as many powerful render machines as you need at any moment. So instead of worrying about the processing capacity, an artist can focus on their job which is to get creative.

With the information on GPU Server rentals presented above, you gained something that could help you as a 3D artist. Hopefully, the knowledge helps you as you embark on the journey towards finding a powerful GPU server to rent for smoother and faster rendering.

To learn more about Xesktop and it works, watch this video:

Good luck with your 3D rendering experience!

GPU rendering optimization guide

After a lot of effort, your favorite picture was completed and ready to get rendered. Suddenly, you find that it is taking longer for the GPU to render than usual, with scene crashes or incorrect rendering occurring more frequently. This indicates that your GPU rendering process needs to be optimized. Reducing memory usage is highly recommended to make the GPU rendering process more optimal.

RAM’s effect on rendering speed

RAM capacity doesn’t affect the render process that much. What is most responsible are the CPU and GPU. However, if your system has insufficient RAM and you extend it to more capacity you will notice a difference in GPU rendering speed. It will allow your system to allocate more resources in RAM and thus work more efficiently. Better GPU render speed is essential in many ways to meet deadlines, to save GPU rental cost, and ultimately save time.

Why does RAM usage have to be reduced?

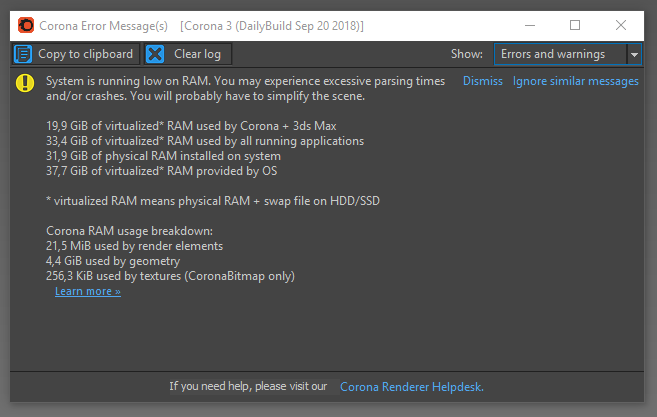
A major loss an artist can cause is a scene crash due to high RAM usage. A very slow render process is another major issue that may arise due to high RAM consumption. This is because the program continuously needs to read and write temporary data from the hard drives and hard drives are much slower than RAM.

Another loss could happen due to a sudden rise in RAM usage including error messages popping up, flickering windows, incorrect rendering, system slowdown, etc. High memory consumption can be reduced by applying some tricks before initiating the rendering process, and this is especially important for GPU rendering.

A GPU can process tasks simultaneously instead of linearly as in a CPU. This kind of parallelization makes it ideal for processing renders, where an image can be rendered in sections at the same time.

However, instead of relying on RAM, GPUs use their own memory, called VRAM. GPUs ship with a limited amount of VRAM. Even if it is possible to use multiple graphics cards in GPU rendering, a render engine will only use the VRAM of the card with the smallest amount of RAM. 

Image of an error message due to high RAM consumption
 Image: Error message due to high RAM consumption (credit: corona renderer). Notice the amount of memory used in the last 5 lines in the error message
Image of an error message in Blender Cycles
Image: Error message in Blender Cycles (credit: Blender stack exchange). GPU renderers are especially susceptible to this error because of their limited VRAM.

New technology such as NV-Link addresses this issue by making it possible for multiple GPUs to utilize each card’s VRAM, but an optimized scene will always lend itself well to the rendering process.

Ways to optimize VRAM and reduce it’s usage during GPU render process

  1. Choose the best Graphics Card

    A rendering program heavily relies on GPU cards to create the user interface. If you often render complex scenes but your system has an inadequate graphics card then it is time to upgrade the one. It doesn’t matter how efficient the system RAM is if your graphics card is not a convenient one. It’s best to identify your needs and replace your old graphics card with an efficient one. Graphics cards VRAM (Video- Random Access Memory) is integrated into a graphics card. It processes the tasks simultaneously instead of linearly as the CPU does. Such parallelization makes it faster to process renders. An image can be rendered in various sections at a time. So, whenever graphics power is required VRAM is utilized. A graphics card relies on its VRAM and stores graphical textures and 3D models in it.

  2. Upgrade RAM

    While a GPU rendering program uses VRAM from graphics cards, several processes indirectly rely on your system RAM. Some GPU rendering software can make use of the CPU’s resources as well, such as V-Ray and Blender’s Cycles’ Hybrid Rendering features. Out-of-core offloading features in engines like Pro Render also allow elements like textures to be first stored in RAM and incrementally loaded into VRAM to avoid memory choking.

    Generally, 16 GB may be enough for beginners doing basic 3D work. 32 GB RAM is ideal for most 3D artists or to intermediate-level artists. For the experts where large textures or complex scenes have to be rendered or when you are working on high-poly meshes 64 GB of RAM is recommended.

    If you want to learn more about choosing the best hardware for 3d rendering, read this guide: How to choose the best hardware for a 3D artist.

  3.  Manage Polycount

    A higher number of polycounts increases the rendering file size. A big file needs more VRAM to get rendered. Large files also take more time for the GPU render process. It is not a big deal when rendering locally but it takes more time in network rendering. In commercial rendering farms, longer rendering time means higher cost. As with textures, the level of subdivision for objects farther away can be reduced.

  4. Check and close unnecessary applications

    Running multiple applications on your computer remains unnoticed several times which consumes a lot of system memory without doing any productive function. So, before initiating GPU rendering, the unnecessary application has to be checked and terminated. This can save a lot of memory spent on those applications. Saved GPU VRAM can be utilized to enhance the functioning of the 3D rendering process. While rendering on the network using GPU rental service, keeping unnecessary applications running can interrupt the rendering process. Xesktop provides constant support to all 3D artists who wanna use GPU rental service.

    If you want to learn more about what GPU server rental service is, read this article: A guide to GPU Server Rentals for 3d Artists, for more information, visit Xesktop, where you can find a step-by-step video showing how to connect to a remote server.

  5. Explore and change unwanted rendering settings

    Each rendering software comes with its custom setting. Usually, most artists overlook those settings. But if you consider it and discover your software’s settings’ area you’re gonna find some settings consuming a lot of your GPU memory and time as well. Some settings consume VRAM or time but do not contribute to the GPU rendering process at all.

    Here you only have to explore such settings and change them to another better option. When talking about settings some newbies or even experienced artists may go for some extravagant settings such as polycount, sampling, and quality this can lead to increased rendering time.

  6. Reducing texture size according to distance

    Usually, texture like things takes up most of the storage. reserve image textures for objects closer to the camera, anything farther back or blurred by Depth of Field will not need the detail a large map provides. It is better to use compressed texture formats to reduce file size. If that fails to reduce enough file format try to reduce its physical size in pixels of texture images. Use compressed texture to reduce texture size.

  7. Optimize modifiers

    The higher number of polys in the model should be reduced by exploring the settings of modifiers. However, it depends on the distance of the object from the camera and some other factors about the object. High polygons are only required when you need to create more detail in the model. Objects without certain shapes like ocean waves don’t need to keep their exact shape here modifier settings can be applied to reduce polygon counts. So that it will minimize VRAM consumption.

    Several modifiers you can optimize to enhance the rendering process are MultiRes Modifier, Prooptimizer Modifier, Optimize Modifier, Batch ProOptimizer Utility. Check the given links to learn more about these modifiers.

  8. Use instancing

    Objects that repeat in the scene such as clumps of grass, bricks, or trees can be instances of one object, and will only require the approximate amount of RAM to render the source object. When you copy a mesh GPU render program creates another mesh and it will be stored in your scene on RAM and hard drive, which increases the polycount numbers.

    Though, when you create an “instance”, a GPU render program will only store the information that a copy of a mesh is available at another location in the scene but will only store data of a single mesh in the scene file and memory. By using instancing one can put a large number of copied objects in the scene but the same amount of VRAM will be used having the same file size as a single object.

    A comparison of instance usage
  9. Separate elements of the scene

    Rendering foreground, middle ground, background separately and compositing them together after can make a complex scene renderable on a GPU. The same could be done for other memory intensive elements like hair. This makes it easy to apply modifiers to the model if required. This results in increased rendering speed required to minimize cost when rendering on the network using GPU rental service.

  10. Mesh and Animation compression

    Meshes and Animation compression is better to reduce the load on CPU and GPU. You can set the Mesh compression to low, medium, or high levels by experimenting with what level of Mesh compression is optimal for your model. Quantization is used for mesh and animation compression that takes up less storage but compression can cause imprecision.

  11. LOD and per-layer cull distances

    It makes objects invisible by culling the objects. It is another way to reduce the burden of CPU and GPU. In most games, a quick and effective way to do this without compromising the gamer’s experience is to move smaller objects more aggressively than larger ones. Like, small rocks may disappear over long distances, while larger buildings will still be visible.

  12. When to collapse models

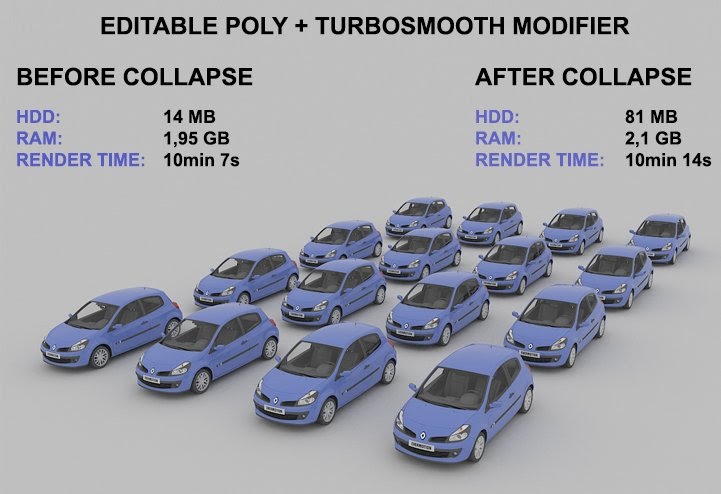
    Before rendering the scene, models with optimizing modifiers need to be collapsed. This reduces VRAM consumption, file size on the hard drive, and render times. While rendering using a GPU rental service, render speed matters to save cost. However, models with modifiers that increase mesh resolution are better not collapsed, since mesh density can be corrected if too high, while the files burden the hard drive less.

    A comparison of resource utilization
    Image: A comparison of resource utilization when models rendered by applying Meshsmooth modifier on them vs model after collapsing the stack to an Editable Poly. The models are copied as instances. Learn more from the article: Optimizing scenes in 3ds Max through geometry

Quick checklist for enhanced 3D rendering experience

  • Share as many materials among various objects as possible
  • Minimize texture map size where possible
  • Optimize distant geometry using poly-reducing modifiers
  • Use instances for duplicate models
  • Close unnecessary applications

References:

Video reference:
https://youtu.be/3Hkm7XJ1B9k 

article references:
https://www.easyrender.com/a/3d-rendering-and-how-to-optimize-your-approach-for-maximum-speed 
https://www.videomaker.com/how-much-ram-do-you-need#
https://docs.unity3d.com/Manual/OptimizingGraphicsPerformance.html
https://docs.unity3d.com/Manual/ReducingFilesize.html

GPU rendering solutions and what’s best for me

You found your way here probably because you have a project you’re working on or will be working on any time soon and you know that the few years old PC or Mac you own likely won’t be able to render this beautiful CG animation within a reasonable time.

Assuming your render engine of choice is one of the capable GPU rendering powerhousesRedshift or Octane, you will have a few options to consider to prepare yourself for the upcoming rendering terror.

If you do it right, the terror can turn into an enjoyable walk in the park. If done wrong, well, it’s not the end of the world. You will be left with your computer rendering your frames for days or even weeks. If you happen to own two computers or have a lot of time on your hands, then that might be an acceptable condition. For those of us who don’t have that much of a luxury, we will try to approach this situation with a sound plan.

long render meme

First, let’s take a 10,000-foot view of the options we have. We don’t want to jump into conclusions too soon while we don’t want to stay with our heads in the clouds for too long either. We want to be pragmatic.

GPU rendering solutions

We could look at all the possible GPU rendering solutions available out there at this time. However, I’m worried that this post would potentially turn into one of those SIGGRAPH technical papers you wish you had time to read. I will look at three viable solutions any of the 3D artists or small studios could implement without too much effort now. I considered these solutions because they are accessible, they are affordable (with certain levels of variance), and most importantly anyone who has very little technical knowledge and no IT experience at all can implement them by themselves.

The solutions are:
– hardware upgrade
– GPU server rental
– cloud render farm

Hardware upgrade

When I was a kid (6th or 7th grade) and got my first PC I was astounded. I loved everything about it. I was really curious about what’s inside and how it worked. I would replace some parts and even take the whole computer apart (with the help of my older friend). That was many years ago, and even though I still feel like I’m that kid inside, now I prefer simpler out of the box solutions.

That being said, I would rather not spend too much time tinkering with the hardware, researching what’s the latest and best CPU or GPU, and then building my computer from scratch. I would rather spend more time using the computer and doing creative work.

There is something that I would do though and I think anyone else can do as well and it is to upgrade or invest in certain hardware parts in a computer I already have (I’m a PC user so I can’t speak for you Apple lovers out there).

Getting a good motherboard with enough PCIe lanes (for multi GPU setups), good power supply, and a good graphics card isn’t that hard and it doesn’t require that much effort. It does require some time to do basic research though. The parts might not be that cheap either if we’re going for a rendering machine that will serve us well at least 3 to 5 years down the line.

Let’s take a look at a few key parts and their prices. I’m not going to go into details because I’m not an expert. I just want you to get a general idea of what’s out there.

Motherboard

AMD: Gigabyte X570 Aorus Ultra – AMD 3rd Gen Ryzen supported motherboard with 2x PCIe x16 slots (2x GPU cards), great for upper mid-range PC builds // $300 (link)

Intel: Gigabyte Z490 Aorus Ultra – 10th Gen Intel supported motherboard with 2x PCIe x16 slots (2x GPU cards), great for upper mid-range PC builds // $300 (link)

Power supply

Corsair AXi 1600 Watt will handle 4x RTX 2080Ti cards, 64GB RAM, TBs of storage, and extra cooling // $550 (link)

Here’s a useful link to a PSU calculator.

Graphics card

RTX 2080Ti – 304 OctaneBench 4 – a beast of a GPU card but very pricey // $2,000
RTX 2060 – 170 OctaneBench 4 – probably best GPU per dollar spent //  $350

Check out this super useful performance per dollar benchmark results based on OctaneBench 4.

Alternatively, if you have some decent savings or got an upfront payment for a large project, you could also invest in a PC built by BOXX, for instance, who are known for building rendering beasts. You can choose a model of a GPU rendering workstation that matches your needs, simply customize the parts you want like the CPU, RAM, storage, GPU cards, and you will have a render box delivered to your door. It’s pricey but if you want peace of mind and want to save time, then go for it. Here’s one of their rendering workstations – APEXX x4 (with 4 GPU slots).

Price: $9,395
– Intel i9-10900X 3.7Ghz
– 128GB RAM
– 1x RTX 2080Ti 11GB (with additional 3 slots for possible GPU upgrade)
– 1TB SSD NVMe + 500GB SSD SATA

APEXX x4 workstation
APEXX x4 workstation https://www.boxx.com/guru/apexx-x4

Now, it’s a bit of an investment to get a PC like this but as with any good investment, it should yield good returns over time. Another upside is that with the setup like this you could buy a few more GPU cards in the future and get a substantial speed boost without much hassle.

GPU server rental

When I say server rental I mean servers in the cloud we can connect to and work on via remote desktop. You could also rent a physical server. Some companies specialize in building powerful rendering rigs and they rent them per day. Those tend to be expensive and we won’t talk about them here.

So why would I need some server in the cloud?

Well, the answer is quite simple – speed and price. Contrary to a still common belief that has stuck around since the dawn of modern cloud computing 20 or so years ago (AWS launched in 2006, also read: a brief history of cloud computing), the cloud isn’t expensive. It used to be but it isn’t anymore.

Another belief is that using cloud computers or cloud rendering as a whole is too difficult and too technically challenging. I’m here to tell you that it isn’t true. Again it might have been true 10 years ago and even 5 years ago but now it’s a very different story. Now we have SaaS (Software as a Service) clouds that are very friendly.

Technology and tools have improved to the point that there are artists who thought they would never be able to understand what’s all the deal with the cloud, now use it daily (I’m one of them). True, they still might not understand how it works (me again) but the point is it has been made possible thanks to artist-friendly services built on top of the complex cloud technology.

These services allow you to rent a powerful server, one that you could only dream of owning, at an affordable price. You can get access to GPU rendering servers that can easily cost upwards of $25,000 (what!) at the fraction of the cost. Who wouldn’t want that?

Imagine having a machine with 10x 1080Ti on board? You can have one just like it a few clicks and a few minutes later. How about a server with multiple Tesla V100? Yes, please! I might even have two!

GPU servers available through Xesktop https://xesktop.com/features/

It’s very simple and takes no time to set up. You create an account, log in to the web dashboard, select the type of machine you want to use, give it a name, and hit “start”. A few minutes later you have a machine you can connect to remotely. It’s like having your computer, the difference is you don’t need to spend thousands of dollars to buy it.

You can install your 3D software and any tools that you normally use for work. You can shut it down any time you’re done using it. You can rent it for a few minutes or a few days at a time. You are in full control of how you use it and when you use it.

You might think “I’d rather buy my computer, it’s cheaper”. Fair enough. Not everyone can afford to invest a hefty amount of money upfront in hardware. You could save up and get your own computer like that. The problem is it’s practically impossible to have the latest graphics card or CPU because as soon as you buy one, there will be a new one 3-6 months from now. Not to mention, while one rendering rig is great to have when you’re just starting or don’t do much animation work, at some point you will need more rendering power.

Services that offer GPU server rental give you a lot of flexibility and peace of mind. You can use them as your main go-to-rendering solution or have it as a backup plan for unexpected tight deadlines or large projects. However you choose to use it, it’s a great addition to your current GPU rendering pipeline. Don’t take my word for it. Test it for yourself. For example, through Xesktop service you can get a trial that will allow you to test the powerful GPU machines and see if you like what you see before you commit.

Cloud render farms

You might have heard the term render farm quite a few times by now. You might have even considered building your render farm. It’s not that hard putting a few Xeon render nodes together after all, isn’t it? Well, honestly it takes quite a bit of time and effort so probably it isn’t a solution for someone like me (but you should decide for yourself, some useful pointers).

Cloud render farms as a service is something that has been around for over a decade. In its early days, the technology wasn’t sophisticated enough nor there was a high enough demand for rendering in the cloud and thus cloud rendering wasn’t popular at all. On top of that, the common concern was questionable security and bandwidth limitations. In 2020, we don’t need to worry about security or internet speed anymore (for the most part). The demand for rendering has been gradually increasing and technological development reached a point where cloud rendering isn’t only a viable option for studios but also freelance artists.

There are a few large public cloud providers like Google Cloud, AWS, and Microsoft Azure with massive infrastructures and thousands of machines available for processing and rendering. They don’t provide a cloud render farm as a service themselves, however, if you’re tech-savvy or are a studio with an IT team, you can build your private render farm on top of their cloud computing platform. IBM has a very good learning resource exploring basic cloud computing topics https://www.ibm.com/cloud/learn/cloud-computing.

There are also dedicated cloud render farm services either built on top of those large public clouds or they have their own private clouds (a.k.a. their own data centers and their own hardware). These types of services are much higher in numbers these days which is a good thing because competition often breeds innovation. One service that knows a lot about innovation and what it means to be artist-friendly is GarageFarm. You might want to check out their GPU rendering offer, you won’t regret it https://garagefarm.net/gpu.

Now, I talked about the server rental services earlier and how they are easy to get started and how affordable they are. Cloud render farms have gone a long way too and what you can get today is really a game-changer.

But first, you might be wondering.

What is the real difference between a GPU server rental service and a cloud render farm service?

Simple answer, they both are GPU cloud services and they both are GPU rendering solutions. However, their approach to the solution is a little different.

The GPU server rental services give you more control over the rendering process and, in general, offer more flexibility. It’s simply another computer you can use to render your project on, not much different from rendering locally on your machine. It also means you need to install your own 3D software and render engine on the computer because usually, it’s a blank system.

The cloud render farms or the GPU cloud render farms (P.S. they aren’t always both CPU and GPU compatible), aren’t as flexible as they follow a certain workflow but are mostly automated systems. You basically install a plugin for your DCC app and send your project to the farm through their software. Then you interface with a web dashboard or some desktop app where you submit and manage your render jobs. You won’t be rendering your scenes on your computer and you won’t be rendering them through a 3D app GUI as you do locally. Instead, all the processing and rendering happens somewhere else on the farm’s end through the network rendering system, and what you get back, in the end, is your rendered frames downloaded to you.

Why would I want to use a cloud render farm?

Cloud render farms are very convenient and very powerful, much more powerful than renting a GPU server or a few servers (even the mightiest of them all). They are convenient because, for the most part, you don’t have to worry about installing and configuring any complex software. All you do is you work with the tools that you’re already using and are familiar with.

A quick and useful explainer about render farms (wish I had watched it years ago)

The render farm plugin for 3ds Max, Maya, Cinema 4D, Blender or any DCC app you’re using takes care of all the heavy lifting for you. It will detect all your settings and it will prepare the project for rendering on the farm automatically. After all, your data is uploaded to the farm and a few clicks later, you will get access to dozens or even hundreds of machines dedicated to your project. At this point, you just have to wait for the finished frames to download back to your computer.

Imagine having 20 or 50 or even more machines with powerful GPUs rendering all at the same time? At this speed, rendering a few hundred frame animation would be a breeze. And all that without any hassle, no upfront investment, and for the price that is accessible for most of the artists.

What’s best for me?

If you’re a freelancer with moderate rendering needs and do 1-2 projects a month, I would suggest investing in a good computer you can rely on. Occasionally, you might look into renting a GPU server for several hours here and there.

If you’re a freelancer with a high clientele often busting out high-end motion graphics and animations, you would need access to large GPU rendering power on-demand to chew through the projects efficiently. In this case, you should go either for GPU rental or use a GPU cloud render farm. Both will do. It’s up to your preference what solution suits you better and the frequency you use them with.

If you’re a small but growing studio with regular work coming in and increasing demand for high-end animation work, you would probably want to consider integrating your pipeline with a cloud render farm. You would want it to be always there as a tried and true tool in your CG toolbox.

Next step

Now that we discussed the most common viable solutions to GPU rendering and some use cases, it’s time for you to look at your needs more closely and think about where you are.

Are you a freelancer who is just starting out? Are you an established freelancer with high demand for animation work? Are you a studio taking on larger projects? How much money do you have saved up? How much can you invest in your business upfront without feeling the impact?

Even if you aren’t pressured by a looming deadline or don’t need to think about a rendering solution at this stage, you might want to consider educating yourself a little and maybe even taking a small step into the future and experimenting with what’s out there. You might be surprised how simple and harmless certain solutions are. You might discover that you could become a more effective, efficient, and capable artist or business. Who knows? It doesn’t take much effort and you have literally nothing to lose (a lot to gain though).

Happy rendering,
Lucas B.

Blender 2.8 beta + Xesktop: Harnessing the power of 10 GPU cards on benchmark scenes

Have you ever wondered what it would feel like to harness the power of ten GTX 1080 Ti cards? Wonder no more! Our dedicated GPU rental service does just that.

With Blender 2.8 well into its beta stage, we thought it would be fun to test one of our servers on the Blender open data benchmark scenes and let you guys have a look at the resulting render times for each. The Blender open data benchmarking tool itself is also in beta at the time of this recording, and sadly wasn’t working for us. In any case, here are manual renders of a frame from each of the benchmark scenes with the resulting times. None of the original render settings were manipulated (except of course for switching the device to GPU rendering and adjusting the tile sizes appropriately).

Here’s a quick rundown of the specs of our servers:

  • CPU: 2x Intel Xeon CPU E5-2620 v4 @ 2.10 GHz
  • RAM: 128GB
  • GPU: 10 x NVIDIA GeForce GTX 1080 Ti, 11GB
  • NVIDIA CUDA Cores: 10 x 3584
  • Octanebench score: 1753

When do we come in handy?

Having the performance capabilities of a server like ours can be a godsend when you’re dealing with turnarounds for complex scenes, or scenes with elaborate dependencies that would produce complications when rendering over a network. Some projects might actually even benefit from rendering over a couple of machines with multiple GPU cards. When working against a deadline, every second counts. Imagine what you could do with an additional workstation containing 10 GTX 1080 Ti’s!

a meme with a man having a heart attack

Our powerful, dedicated GPU servers are at your disposal for GPU 3d rendering, processing Big Data, or any task that can benefit from parallel processing. After registering, you get your very own web dashboard where you can easily create your personal windows instances on top of our servers, and go back to them just as you left them whenever you need to.

We offer our servers at the incredibly low rate of $6 an hour, creating and entering your servers takes just a few clicks, and best of all, we’ve got a team of specialists you can chat with anytime.

Xesktop is powered by GarageFarm.NET, which means if you’ve rendered at GarageFarm before, you can use your credentials to log into your Xesktop dashboard and rent servers with your existing GarageFarm credit balance.
If your local rig is struggling with a complex scene, you could bring it over to your Xesktop workstation, finish it there, and hit render, or send it over to GarageFarm for some good old fashioned CPU rendering – whatever you need. Think of Xesktop as another addition to your cloud based pipeline.

If you want to experience rendering your own scenes on a set up like this, give our service a try.

Happy Trails from all of us at Xesktop!