A guide to remote desktop rendering for 3D artists
Remote desktop rendering gives 3D artists a way to use a more powerful computer over the internet instead of relying only on their own laptop or workstation. You connect to a remote machine, open your 3D software there, work on the project, render the final output, then download the files when they are done.
For beginners, this can be a practical middle ground. You may not be ready to buy a new workstation yet, but your current computer might struggle with larger Blender scenes, Cinema 4D projects, Redshift renders, Octane work, Unreal Engine cinematics, or high resolution stills. Remote desktop rendering helps fill that gap.
In short: your local device becomes the screen and controller, while the remote computer handles the heavy work.
What remote desktop rendering means
Remote desktop rendering means using your own computer to control another computer somewhere else. That remote computer has the hardware needed to open, preview, and render heavier 3D scenes.
For a 3D artist, this can feel a lot like using a normal desktop. You connect to the remote machine, open Blender, Cinema 4D, Maya, 3ds Max, Houdini, Unreal Engine, or another 3D tool, then work inside that environment. The rendering power comes from the remote system, not your local laptop or desktop.
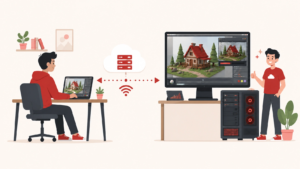
The local computer becomes the control screen
Your own device mainly handles the connection. It streams the remote desktop to your screen and sends your mouse, keyboard, or tablet input back to the remote machine. That means a lighter laptop can control a much stronger workstation. The local computer does not need to carry the full rendering load.
The remote machine does the heavy work
The remote computer handles the actual 3D workload. It uses its own GPU, CPU, RAM, storage, drivers, and installed software. This matters because many 3D scenes can become too demanding for an everyday machine. Large textures, high sample counts, complex lighting, dense geometry, simulations, and long animation sequences can quickly slow down local hardware.
How remote desktop rendering is different from a render farm
Remote desktop rendering and render farm rendering are related, but they are not the same workflow.
With remote desktop rendering, you control the whole workstation. You can open the scene, fix missing textures, change camera settings, adjust samples, preview materials, and render directly from the remote computer. With a render farm, you usually submit a finished job. The farm processes the frames, often across many machines, then sends the results back.
Remote desktop rendering is more hands on
Remote desktop rendering works well when you still need control over the project. Maybe you need to troubleshoot the scene. Maybe you need to test several lighting versions. Maybe you want to see how the render behaves before sending the final output. It is useful during active production, not only at the final render stage.
Render farms are better for large batch rendering

A render farm is often better when the scene is already prepared and you need many frames processed. For example, an animation sequence with hundreds or thousands of frames may be better suited to a farm, especially when the goal is to finish the full sequence as quickly as possible. Many artists use both approaches. Remote desktop rendering helps with setup and testing.
Why 3D artists use remote desktop rendering
Remote desktop rendering is becoming more relevant because 3D work keeps getting heavier. Artists are working with higher resolutions, more detailed assets, more demanding render engines, and faster client turnarounds.

The remote desktop software market was valued at $3.92 billion in 2025 and is projected to grow to $4.63 billion in 2026 (Fortune Business Insights). The GPU as a service market was valued at $6.07 billion in 2025 and is projected to grow to $8.66 billion in 2026 (Fortune Business Insights). For 3D artists, the reason is easy to understand. More projects need strong hardware, but not every artist needs to own that hardware every day.
More rendering power without buying a new workstation

A new workstation can be expensive. For beginners and freelancers, buying a powerful GPU machine may not make sense if heavy projects only come once in a while. Remote desktop rendering gives artists a way to access stronger hardware when they need it. This can help with high resolution stills, animation previews, product renders, architectural visuals, game assets, cinematic scenes, and GPU based rendering workflows.
More flexibility during deadline pressure

Deadlines are one of the biggest reasons artists look for remote rendering options. A project may start simple, then grow. A client might ask for a higher resolution. A scene might become heavier after lighting and materials are added. A short animation might suddenly need several extra versions. In those moments, remote desktop rendering can give an artist more room to finish the work without stopping everything to upgrade local hardware.
More freedom for beginners and freelancers

Remote desktop rendering also helps artists who are still building their setup. A beginner might have a laptop that is fine for modeling and learning, but not strong enough for final renders. A freelancer might want to accept a bigger project without immediately buying a new machine. This makes remote rendering useful as a bridge. It gives artists access to stronger tools while they decide what hardware they actually need in the long run.
What beginners need before starting
Remote desktop rendering is easier when your project is organized before you connect. The remote machine may be powerful, but it still needs the right files, software, and settings.
A stable internet connection
Remote desktop work depends on a good connection. Speed helps, but stability matters just as much. If the connection drops often, the session can feel frustrating. Viewport movement may lag, file transfers may fail, and interactive work can feel slow. A wired connection or reliable private network is usually better than crowded public WiFi.
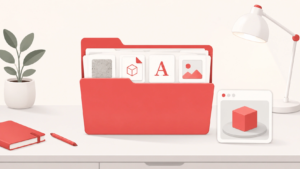
A clean project folder
A clean project folder is one of the best ways to avoid problems. Keep your scene file, textures, caches, references, and outputs organized. Before uploading, check that the file opens properly on your local machine. Remove unused files if the folder is messy, but do not delete anything unless you are sure the scene no longer needs it.
Matching software versions
Software versions matter. A scene saved in one version of Blender, Cinema 4D, Maya, Houdini, or 3ds Max may not behave the same way in another version. The same applies to render engines and plugins. Redshift, Octane, V Ray, Arnold, Cycles settings, and other tools can change between versions. If the remote machine uses the wrong setup, the scene may open with errors or render differently.
Working licenses
Some tools require license activation on the remote machine. Others allow sign in access, floating licenses, or cloud based license systems. Check this before a deadline. A powerful remote workstation will not help much if the software cannot launch or the render engine cannot activate.
When remote desktop rendering makes sense
Remote desktop rendering works best when local hardware becomes a bottleneck. It is most helpful when the project is too slow, too heavy, or too urgent for your current computer.
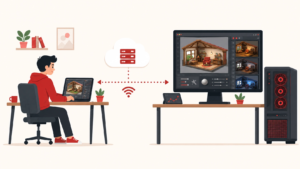
Your local computer is slowing down the work
If every preview takes too long, rendering becomes painful. You may spend more time waiting than adjusting the scene. A remote workstation can help you keep moving. This is especially useful for lighting, look development, material tests, and preview renders.
Your scene needs more GPU memory
Many artists focus on GPU speed, but memory is often the bigger limit. If the scene is too large for the local GPU, the render may fail, crash, or become extremely slow. Remote machines with more GPU memory can help with large textures, dense assets, heavy scenes, and complex render settings.
You need your own computer free
Rendering can make a local machine hard to use. Fans get loud, software slows down, and other tasks become annoying. With remote desktop rendering, the heavy work happens elsewhere. You can keep using your own computer for editing, communication, writing, file management, or other creative tasks.
You only need extra power sometimes
Not every artist needs a powerful machine every day. Some weeks are light. Other weeks bring heavy client work. Remote desktop rendering fits that uneven rhythm. You can use more power during demanding projects, then go back to your normal setup when the job is done.
When remote desktop rendering may not be the best choice
Remote desktop rendering is useful, but it is not the right answer for every project.
Small projects may not need it
If your scene already renders quickly on your local machine, remote setup may add extra steps without much benefit. Simple modeling tasks, small still images, lightweight scenes, and quick tests may be easier to finish locally.
Large uploads can slow the process
Some projects are difficult because of file size. Simulation caches, large texture libraries, EXR sequences, and heavy references can take time to upload. If the upload takes longer than the render itself, remote desktop rendering may not be worth it for that specific job.
Poor internet can hurt the experience
Remote desktop rendering relies on interaction. If the connection is unstable, even a powerful machine can feel awkward to use. This matters most for tasks that need constant input, such as animation timing, sculpting, detailed layout, or fast viewport navigation.
License setup can create delays
Software licensing can become a surprise problem. Some plugins, render engines, or commercial tools may need extra setup before they work remotely. Beginners should test this early, not on the night before delivery.
A beginner workflow for a first remote render
The first remote render should be simple. Choose a small project before using remote desktop rendering on urgent client work.
Prepare the project locally
Start by saving a new version of your scene. Collect the textures, caches, fonts, references, and linked files into one organized folder. Open the scene locally and check that it works. If possible, render one small test frame before uploading. This gives you something to compare against later.
Upload the complete folder
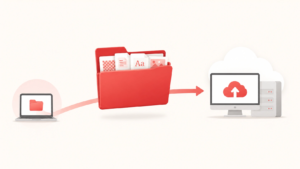
Move the full project folder to the remote machine. Keep the folder structure the same. Avoid uploading only the main scene file. Most 3D projects depend on external assets, so missing files can cause broken materials, missing images, or incomplete renders.
Open the file on the remote workstation
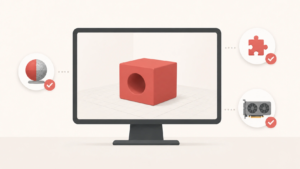
Launch the right 3D software on the remote machine and open the scene. Check the project carefully. Look for missing textures, broken links, missing plugins, wrong output paths, or render engine warnings. Make sure the software can see the GPU if you are using GPU rendering.
Render one test frame
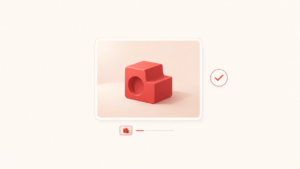
Run a test frame before committing to the final output. Use the correct camera and output format, but keep the test small enough to finish quickly. Check the lighting, color, materials, file format, frame range, and output folder. This step can save a lot of time.
Render the final output
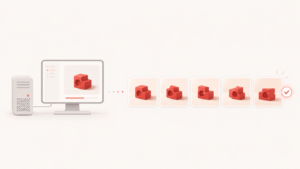
Once the test looks correct, render the final image or sequence. For animation, use an image sequence when possible. This gives you more control if a frame fails or needs to be replaced later.
Download and shut down
After rendering, download the final files and any updated project files you need to keep. Then shut down the remote session or stop the machine according to the service instructions. This is especially important if billing continues while the machine is running.
Common beginner mistakes
Most remote desktop rendering problems come from preparation, not from the concept itself.
Uploading only the scene file
A scene file alone is often not enough. Textures, HDRIs, caches, references, and fonts may live outside the scene file. Before uploading, package or collect the project so the remote machine can find everything.
Skipping the test render
A full render should never be the first render. Test one frame first. This helps catch wrong cameras, missing materials, incorrect color settings, file path errors, and plugin issues before they affect the full job.
Choosing hardware without thinking about memory
A powerful GPU name can be tempting, but memory matters a lot in 3D rendering. If a scene does not fit into GPU memory, the render may fail even if the GPU is fast. Beginners should think about both speed and memory when choosing a remote machine.
Rendering directly to video
For animation, rendering directly to a video file can be risky. If something fails, the whole output may be affected.
An image sequence is safer because each frame is separate. You can review frames, replace problem frames, and encode the final video afterward.
Leaving the machine running
Remote machines may bill by time. If the session keeps running after the work is done, costs can add up. Download your files, confirm everything is saved, then stop or shut down the machine.
Conclusion
Remote desktop rendering gives 3D artists a flexible way to use stronger hardware without building or buying a full workstation right away. It is especially useful for heavy scenes, short deadlines, occasional high power needs, and artists who want to keep working while a remote machine handles the render.

The best way to start is with a small test project. Prepare the folder, upload everything, open the scene remotely, run one test frame, check the result, then render the final output. Once the workflow feels familiar, remote desktop rendering can become a useful tool for bigger projects, freelance deadlines, animation previews, and high quality final renders.


