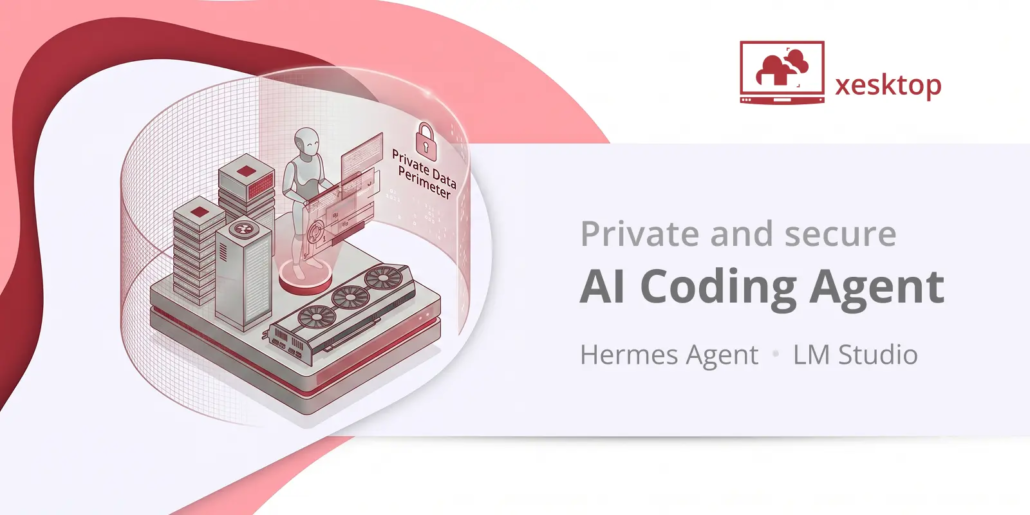
How to run your own private AI Coding Agent in 2026
Every time you send code, files, or prompts to a hosted AI service, that data leaves your perimeter. For casual tasks, the convenience is worth the trade-off. But when you’re working with private repositories, sensitive client data, or long-running coding workflows, that convenience becomes a liability.
You lose more than just privacy; you lose control. Proprietary platforms often track usage and traces your work habits. Furthermore, major AI providers reserve the right to use submitted data to tune their models and improve future performance, a standard practice across the industry – take Cursor and ChatGPT for example, their free and low tier plans have data sharing enabled by default.
If you would rather keep your intellectual property and work habits out of these training sets, you’re in the right place. You don’t need a massive hardware budget to run AI agents locally and privately.
I’ve developed a streamlined setup to run open-source models using a remote GPU server. No subscriptions, no data sharing, and total control over the environment. Here is how to create your own AI coding agent.
Open-source models vs. Proprietary AI models
Open-source models are closing the capability gap with industry leaders like GPT 5.4, Opus 4.7, and Gemini 3.5, offering competitive reasoning and coding performance. However, the true advantage of the open-source ecosystem lies in three key areas:
Privacy:
By hosting your own models, you ensure that no prompts, code, or work habits leave your infrastructure. Unlike proprietary services, where your data is often utilized to train future iterations of the model, local execution guarantees that your intellectual property remains entirely yours.
Cost Predictability:
While proprietary models rely on subscription fees, local hosting allows for fixed costs via a cloud GPU provider or owned hardware. You are not paying for the convenience of the cloud; you are paying solely for the compute resources you utilize.
Customization:
Open-source models allow you to fine-tune behaviors, system prompts, and tool access without the restrictive guardrails often imposed by closed-source providers. You can optimize the model specifically for your codebase, your coding style, and your specific project workflows.
I’ve tested different models and agents locally and I want to share my setup with you.
1. Software stack
The software we’ll be using is easy to set up. You don’t need to be an experienced dev to get started.
Inference:
- LM Studio – a free desktop application to download and serve models on the remote server.
- Models – Gemma 4 31B, Qwen3.6 27B, NVIDIA Nemotron 3 Super, etc.
- Hermes Agent – an autonomous agent that lives on your server.
- Xesktop – GPU inference and hosting platform.
Access:
- IDE – we will add LM Studio as a model provider in code editor i.e. VS Code or Zed to assist with coding.
- Message app – we will setup a messaging channel (Telegram, Slack, Discord) to talk to our Hermes agent in a convenient way.
- SSH – we will connect to our remote machine and talk to our agent via SSH. It’s optional.
- Agent harness – we can also add LM Studio as a model provider in OpenCode to use the agent locally.
- Tailscale – we will setup a private end-to-end connection between our local machine and the remote server.
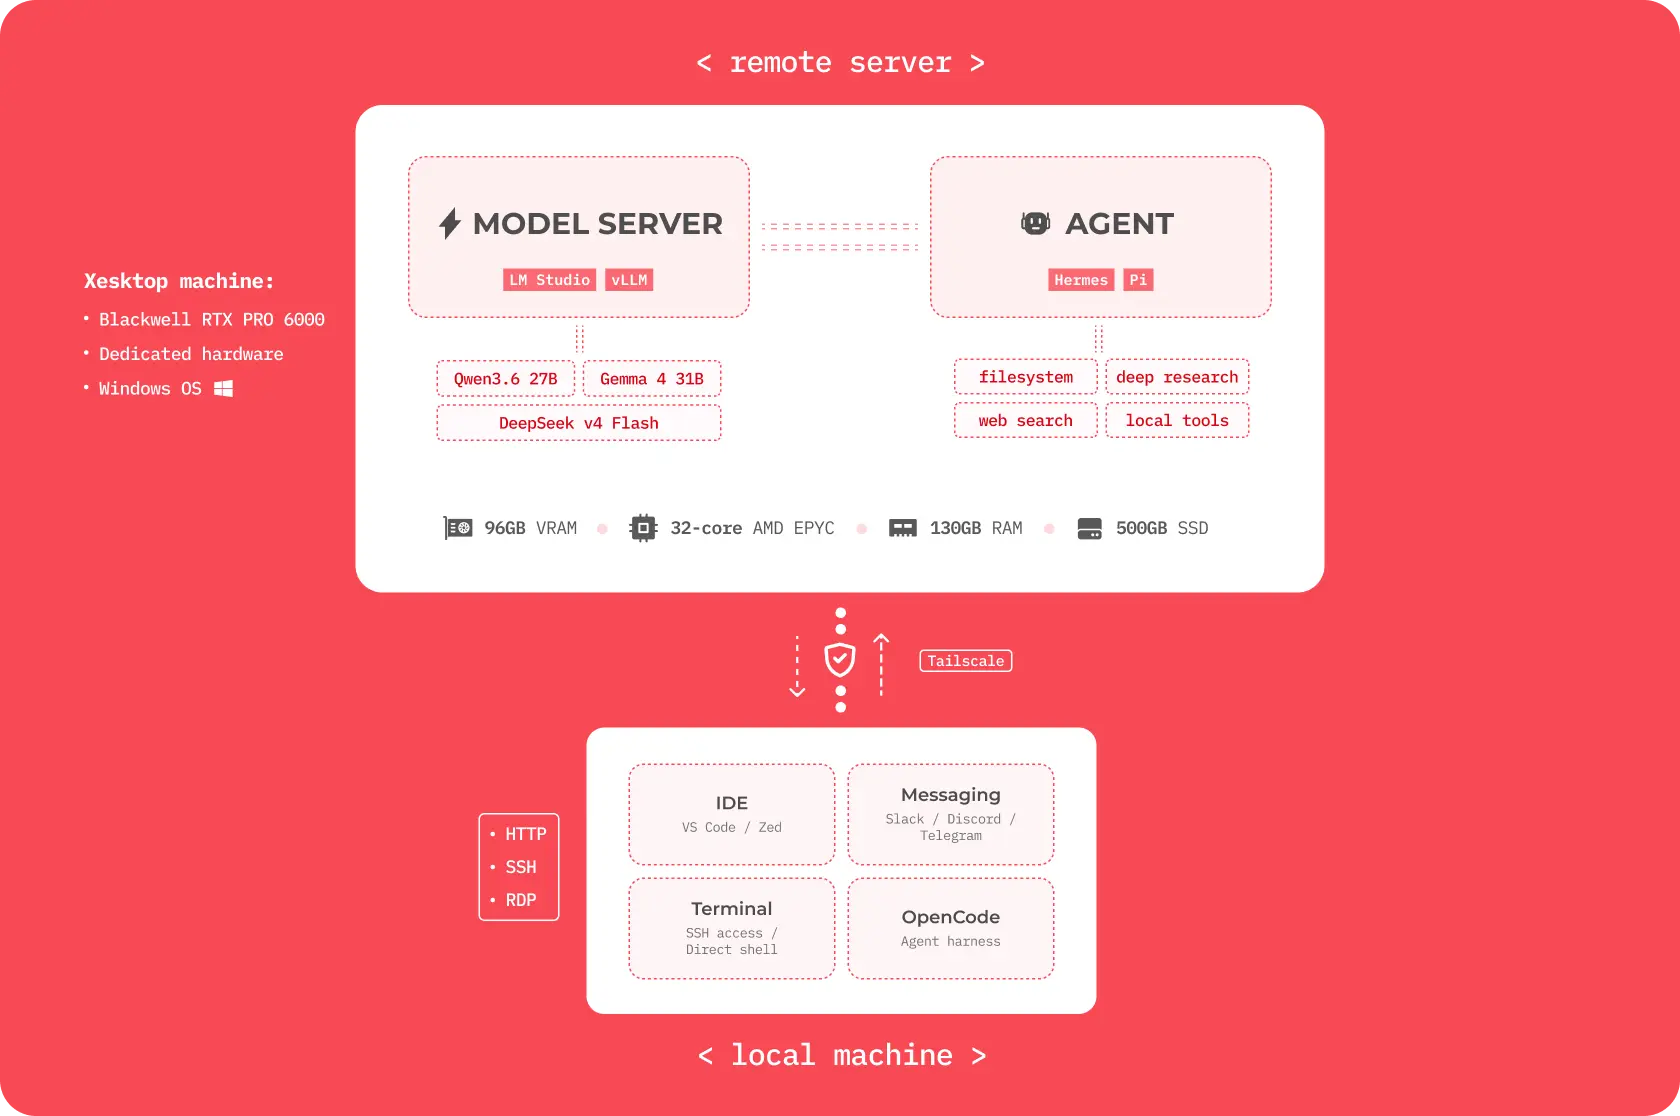
Local machine <–> remote machine connection diagram
2. Server box
For my setup, I’m going to use Xesktop to host the model and run the AI agent on. You can choose any other hosting platform of your choice. Because my machine does not have a good GPU, and I want to run my own model privately, Xesktop makes most sense for this use case. If you have a GPU with 40GB+ of VRAM, you can skip this step and move on to 3. LM Studio setup.
Server Specs
RTX 6000 Pro Blackwell 96GB VRAM
32-core AMD EPYC
130GB RAM
500GB SSD
This is quite a beefy machine that allows me to run multiple agents for an extended period of time. Because I will use Hermes Agent on the server with full access to the system, I don’t have to worry about running out of VRAM, RAM or disk space. I will be asking Hermes to install several tools to help me with my day-to-day work and coding.
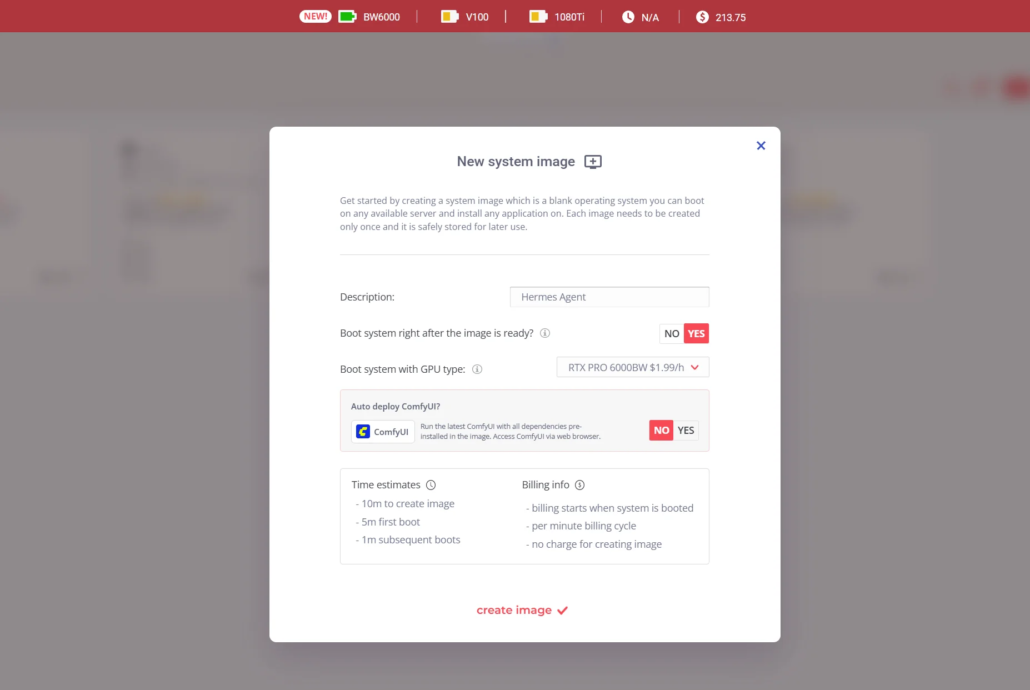
First, I will create a new system image on Xesktop, give it a name, and select RTX PRO 6000 as my GPU. A few minutes later, once the image is ready, I’ll connect to the machine via RDP (Remote Desktop Protocol).
New system image:
RDP connection:
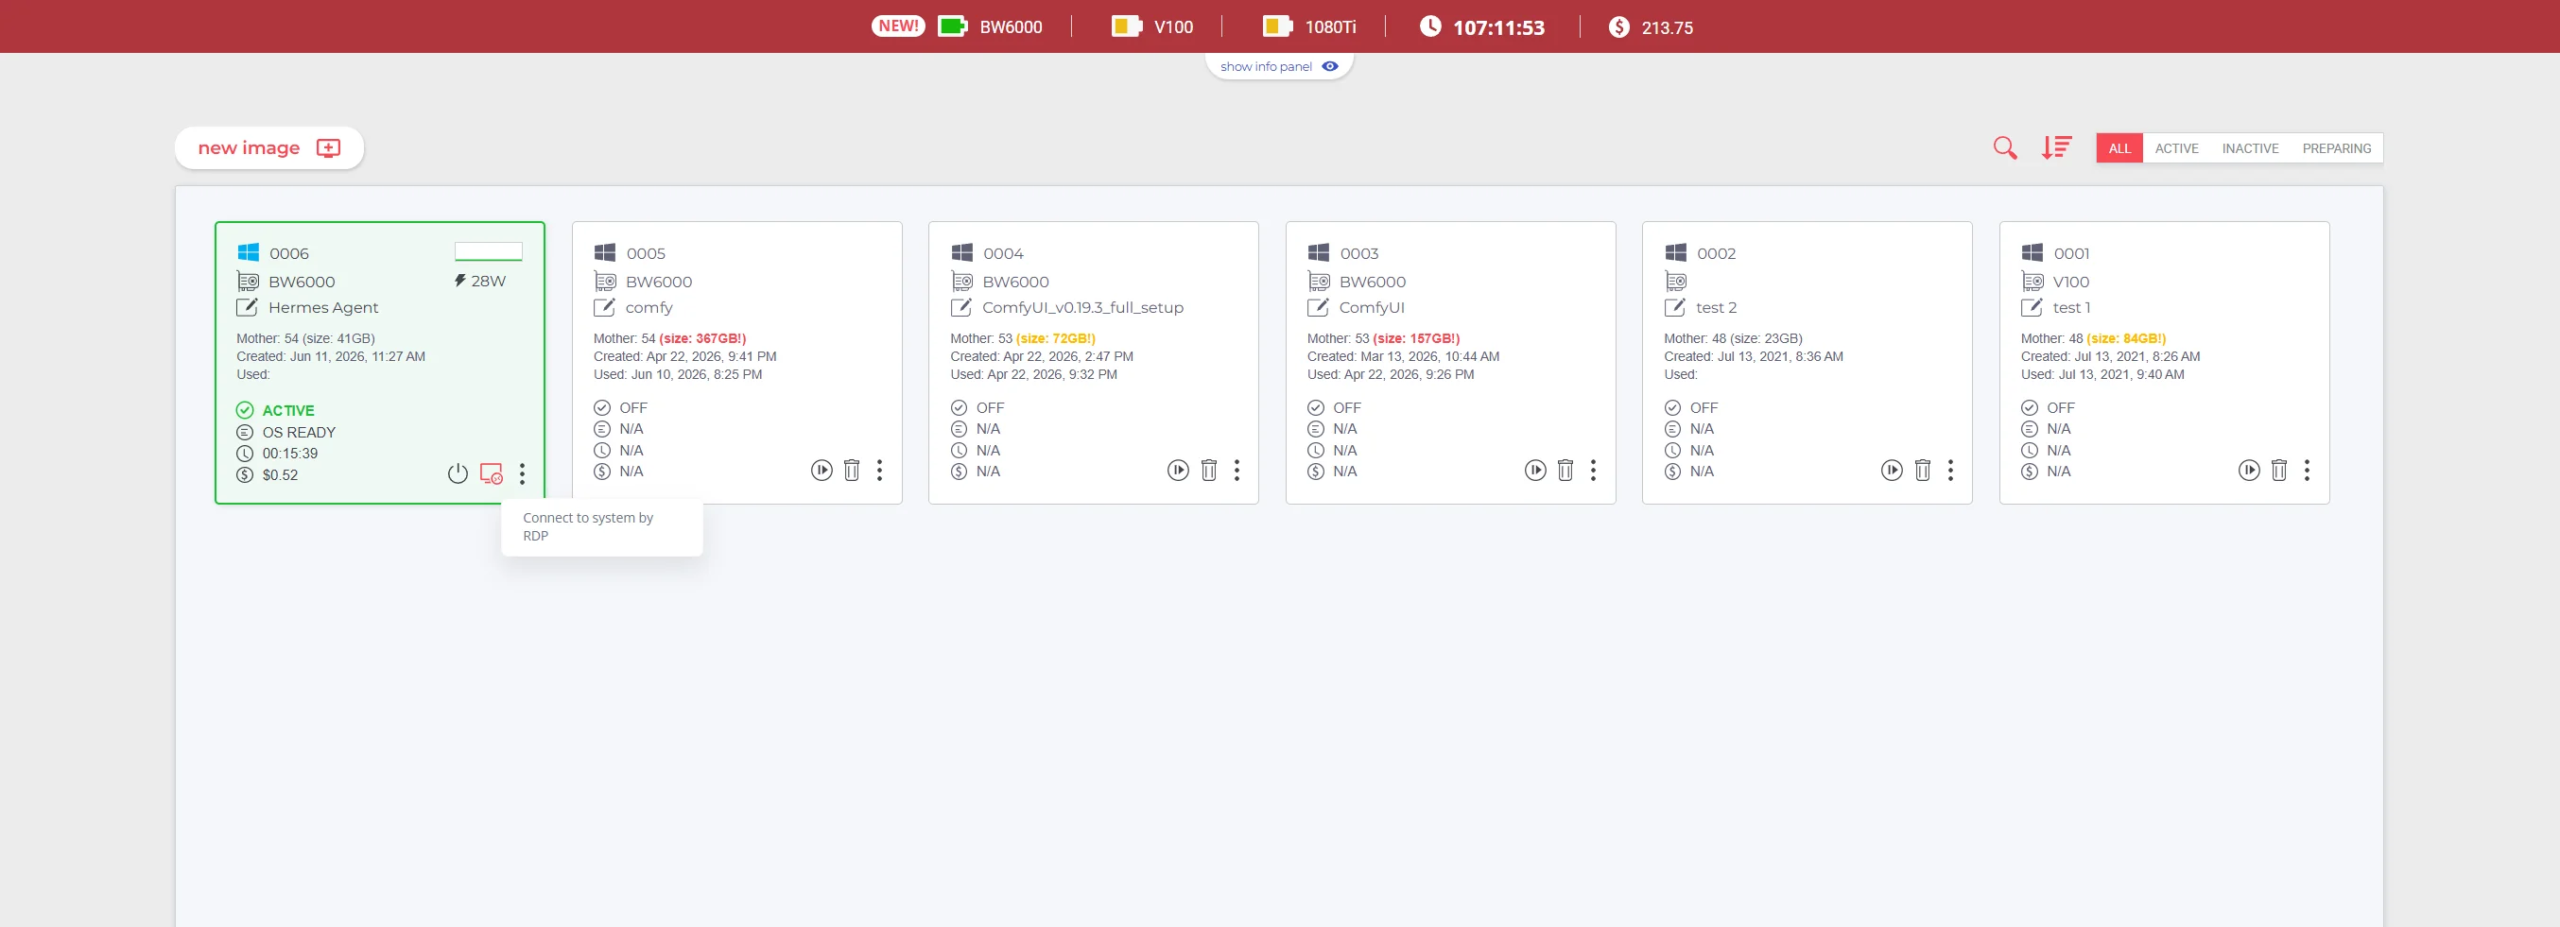
When the image is created and the machine is launched, we can download the RDP file and then open it to connect to our remote machine. Windows supports RDP natively while on MacOS we need to download the free Windows App by Microsoft in the Apple App store which allows us to import an RDP file.
3. LM Studio setup
LM Studio is a desktop app that allows us to download and manage open-source models in an easy and intuitive way. LM Studio has a built-in chat interface so we can talk with the models directly in the app. But what’s more interesting to us in this case is the server feature. We can turn the app into a model server with the http connection enabled for our agent and our local machine to use as an endpoint.
Let’s download the free app from the official site – we’re going to use the Windows version and install it on the Xesktop machine; no account required.
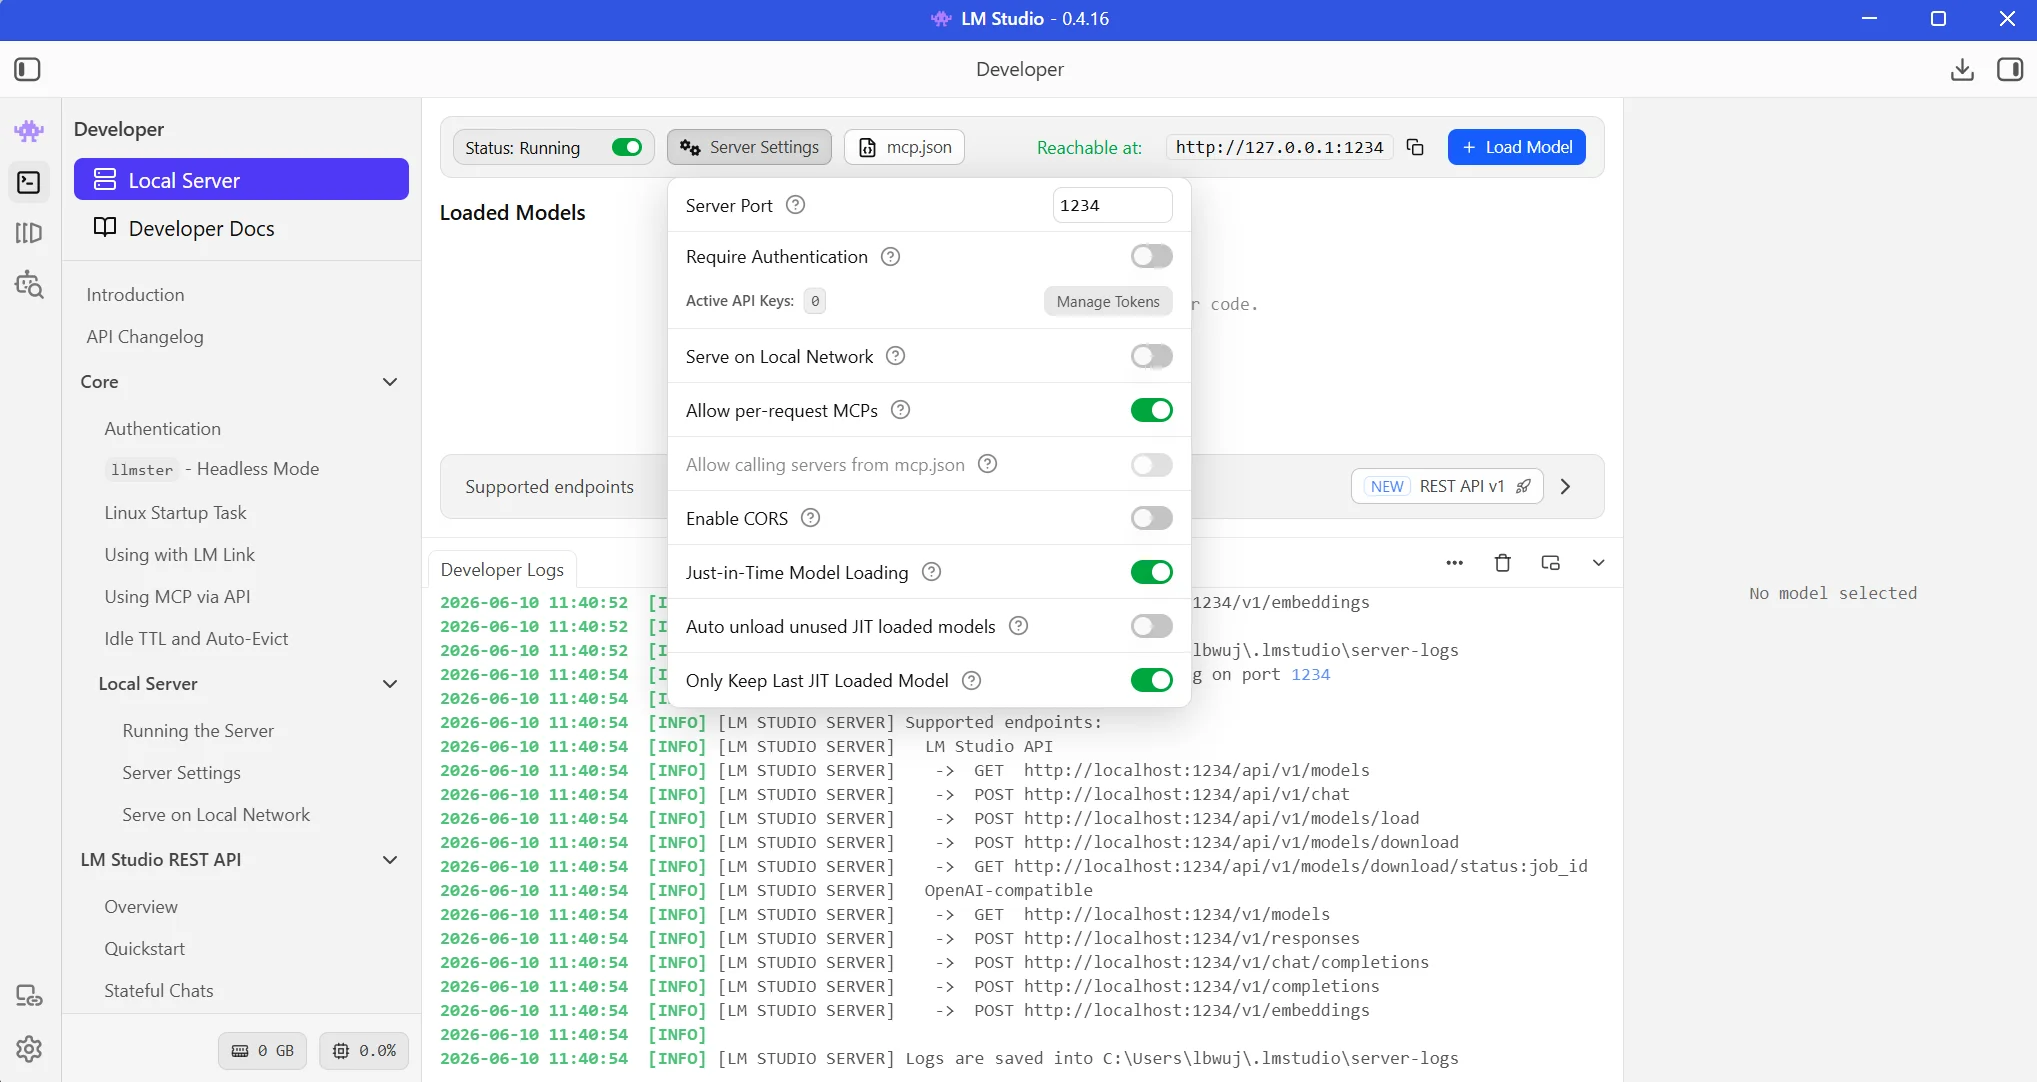
Developer tab – Server Settings
Let’s go to the Developer tab in LM Studio, start the server and then under Server Settings enable “Serve on Local Network” and “Enable CORS”. Once they are all enabled, we can load the model and reach it via supported endpoints.
Models
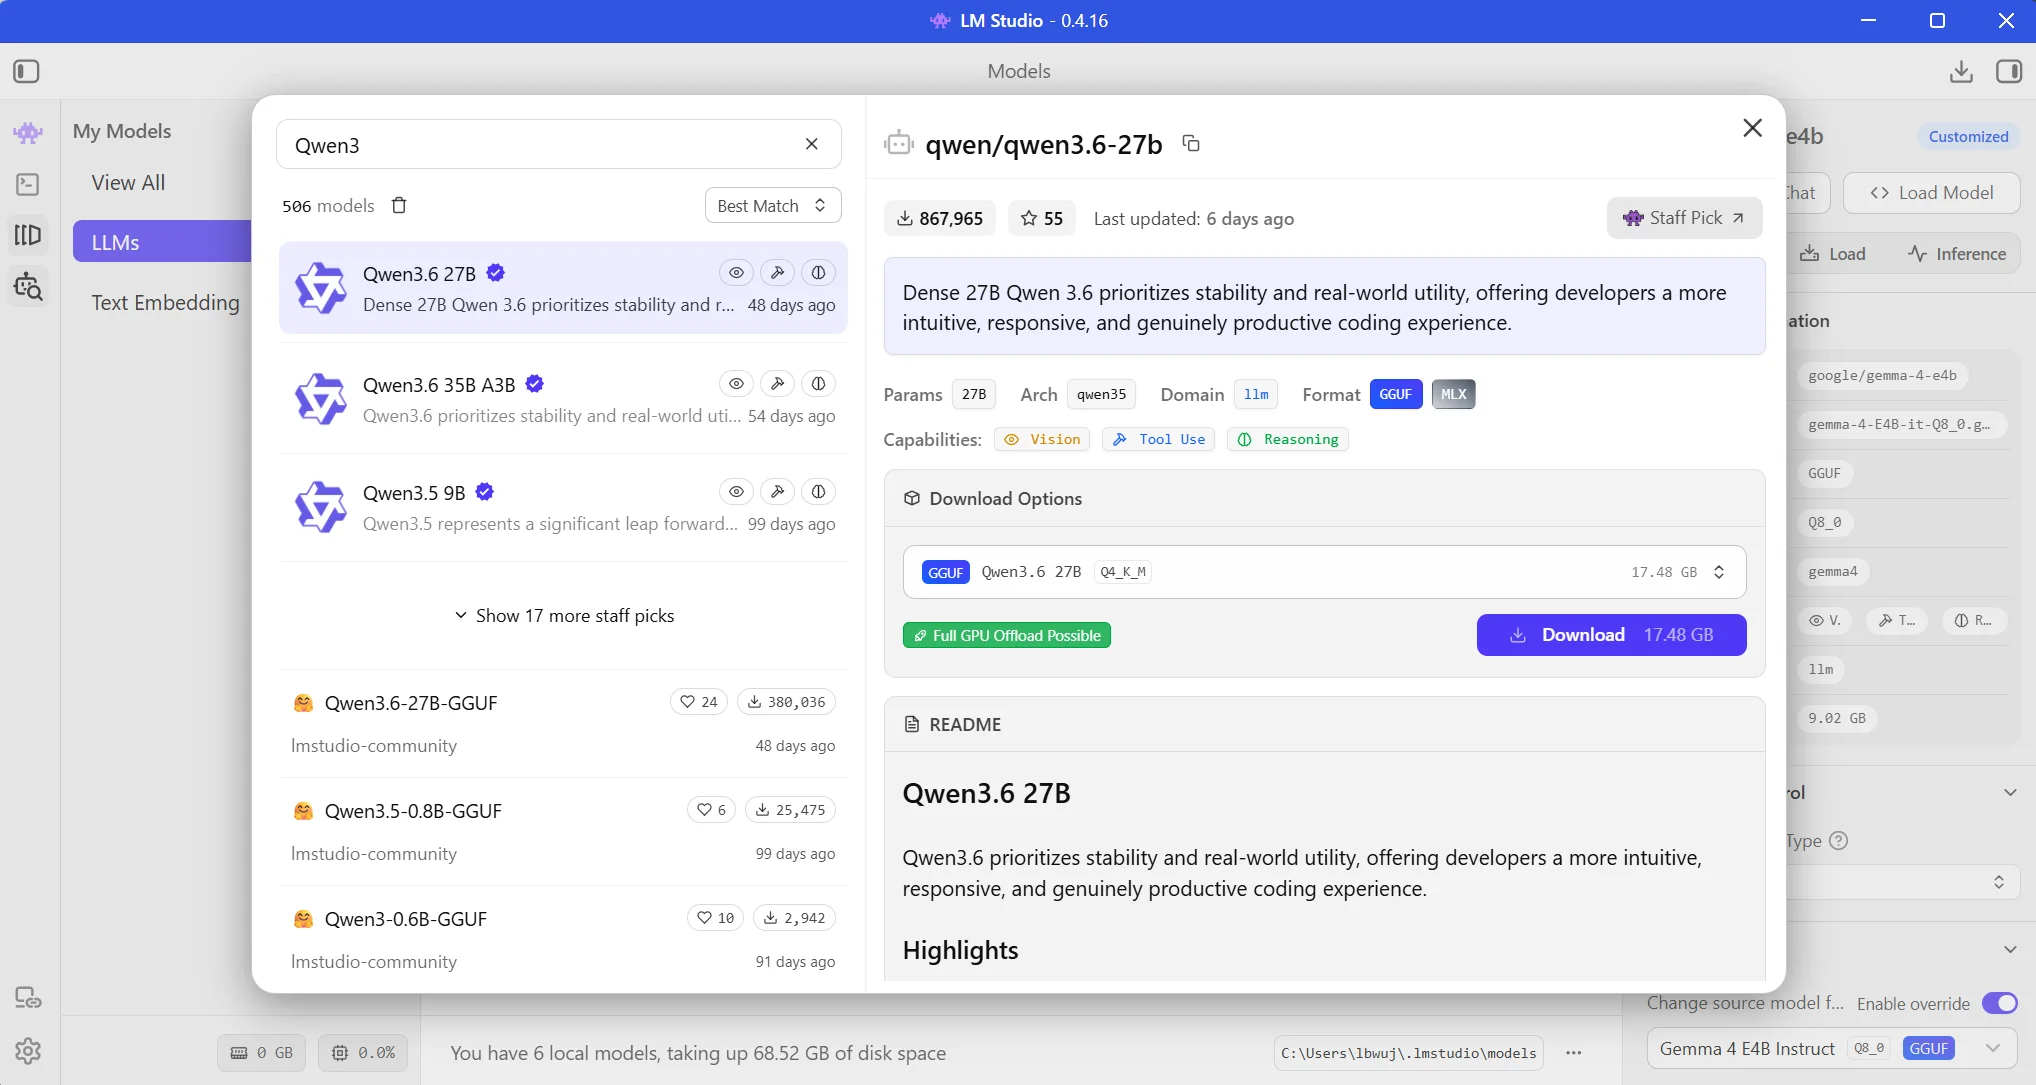
LM Studio supports model weights in GGUF format. There are two ways to get a GGUF model.
A: built-in search
- Open LM Studio
- Switch to model search tab
- Type a model name (e.g. “Qwen3.6 27B”)
- Pick a quantization, click Download
B: Hugging Face download
- Go to https://huggingface.co
- Search for a model + “GGUF” or select LLM Studio app filter https://huggingface.co/models?apps=lmstudio&sort=trending
- Look for repos by unsloth, bartowski, lmstudio-community, or similar
- Download the .gguf file
- In LM Studio: click my models tab → at the bottom open the path → drop the file in
Suggested models
- Qwen3.6 27B | Q8_0 | 29.5 GB | Code generation, agentic coding
- Qwen3.6 35B A3B | Q8_0 | 34.4 GB | Best quality/size, agentic coding
- Gemma4 31B | Q8_0 | 31 GB | General reasoning, instruction
- NVIDIA Nemotron 3 Super 120B | Q4_K_M | MoE general reasoning, agentic coding
Choose the model you prefer, download it, and then load it by hitting the “+ Load model” blue button in the Developer tab. To verify the server is running and the model has been loaded run:
PowerShell
Invoke-RestMethod -Uri "http://localhost:1234/v1/models"

then run this command
Invoke-RestMethod -Uri "http://localhost:1234/v1/chat/completions" -Method Post -ContentType "application/json" -Body '{"model": "any", "messages": [{"role": "user", "content": "This is a test"}], "temperature": 0.7}'
The response message should list the model that is currently loaded.
With that done and the server running, we can now create a private connection.
4. Private connection
Now that we have the model downloaded and the LM Studio server running successfully on the remote machine, we can establish a private connection between two machines using Tailscale.
Tailscale is a zero-configuration free desktop application that allows us to establish an encrypted connection between devices without exposing them to the internet. In our case, we will install Tailscale on both our local machine and the remote machine that is running LM Studio.
Let’s download Tailscale from the official site. Install it on both machines, then log in to your account to be able to connect both devices. That’s basically it.
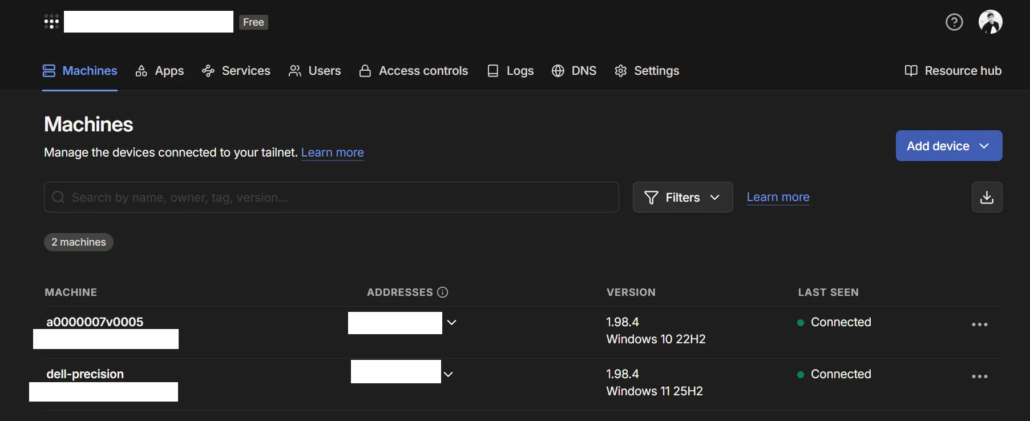
Visit the web dashboard to manage your devices: https://login.tailscale.com/admin/machines
In the screenshot below, both of my machines are connected – Xesktop remote machine and the local machine.
Let’s test the connection.
On your local machine, use the same command we used earlier but replace the localhost with the IP address your remote machine has been assigned by Tailscale.
PowerShell
Invoke-RestMethod -Uri "http://REMOTE.MACHINE.IP:1234/v1/chat/completions" -Method Post -ContentType "application/json" -Body '{"model": "any", "messages": [{"role": "user", "content": "This is a test!"}], "temperature": 0.7}'

Bash
curl -X POST "http://REMOTE.MACHINE.IP:1234/v1/chat/completions" -H "Content-Type: application/json" -d '{"model": "any", "messages": [{"role": "user", "content": "This is a test!"}], "temperature": 0.7}'
You should get a response containing the model info and a reply message.
5. Install Agent
At this point, we have the model server running and a private connection established. It’s time to install the agent.
I’m going to use Hermes Agent because it’s easy to set up and it’s a well-established project.
Prerequisites
Python 3.11
Node.js v22
Ripgrep
ffmpeg
Hermes install command
We don’t have to worry about checking and installing dependencies because Hermes will take care of it, including the prerequisites if it detects they’re missing.
PowerShell
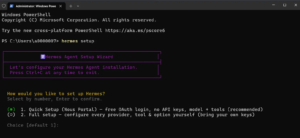
iex (irm https://hermes-agent.nousresearch.com/install.ps1)
Select “Full setup”:
Select “LM Studio” as the model provider and then type a dummy API key when asked to provide one since the server is running locally:
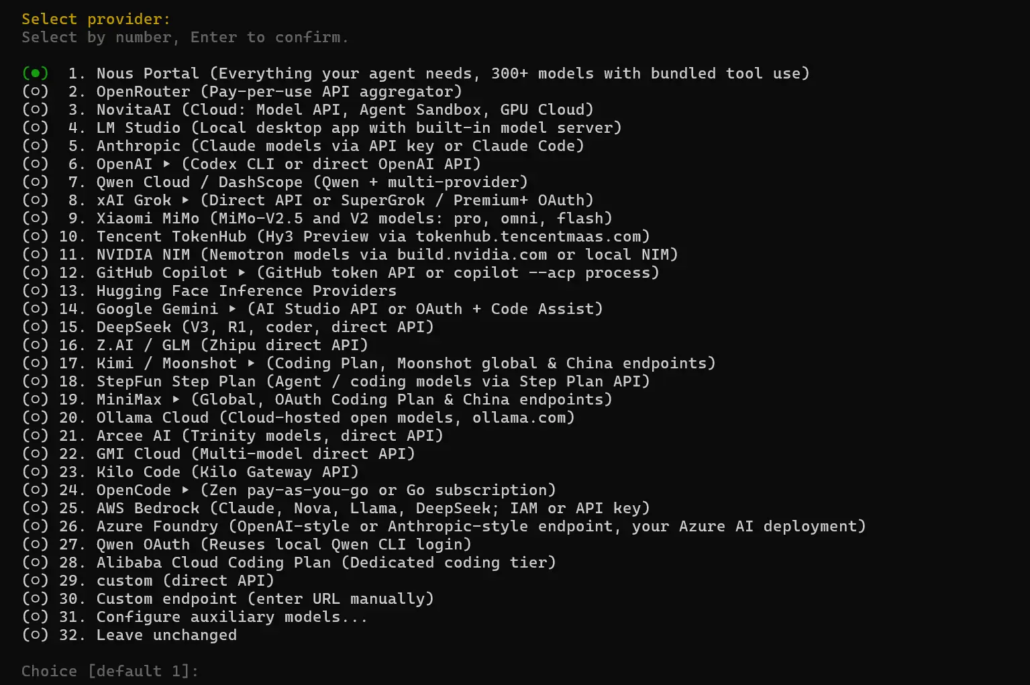
After that go through the rest of the config:
- select default model
- select local for terminal backend
- select messaging platform (I will use Telegram and will show my setup in the next step)
- select tools for CLI
- choose search provider or skip it
6. Set up messaging channel
I’m going to use Telegram as a chat platform to talk to our agent.
Hermes has a detailed guide on how to set up a bot on Telegram that we can converse with. Note that setting up a messaging app is just for convenience and it’s not required. We can still chat with the agent inside the terminal cli.
The gist of it is that first we need to create a Telegram bot using an official Telegram bot tool. Then save the access token the tool generates and provide it to Hermes during the initial setup.
During the interactive config, Hermes will prompt you to use a QR code or a link to setup the bot for you, which is the quickest way, so I recommend doing it that way.
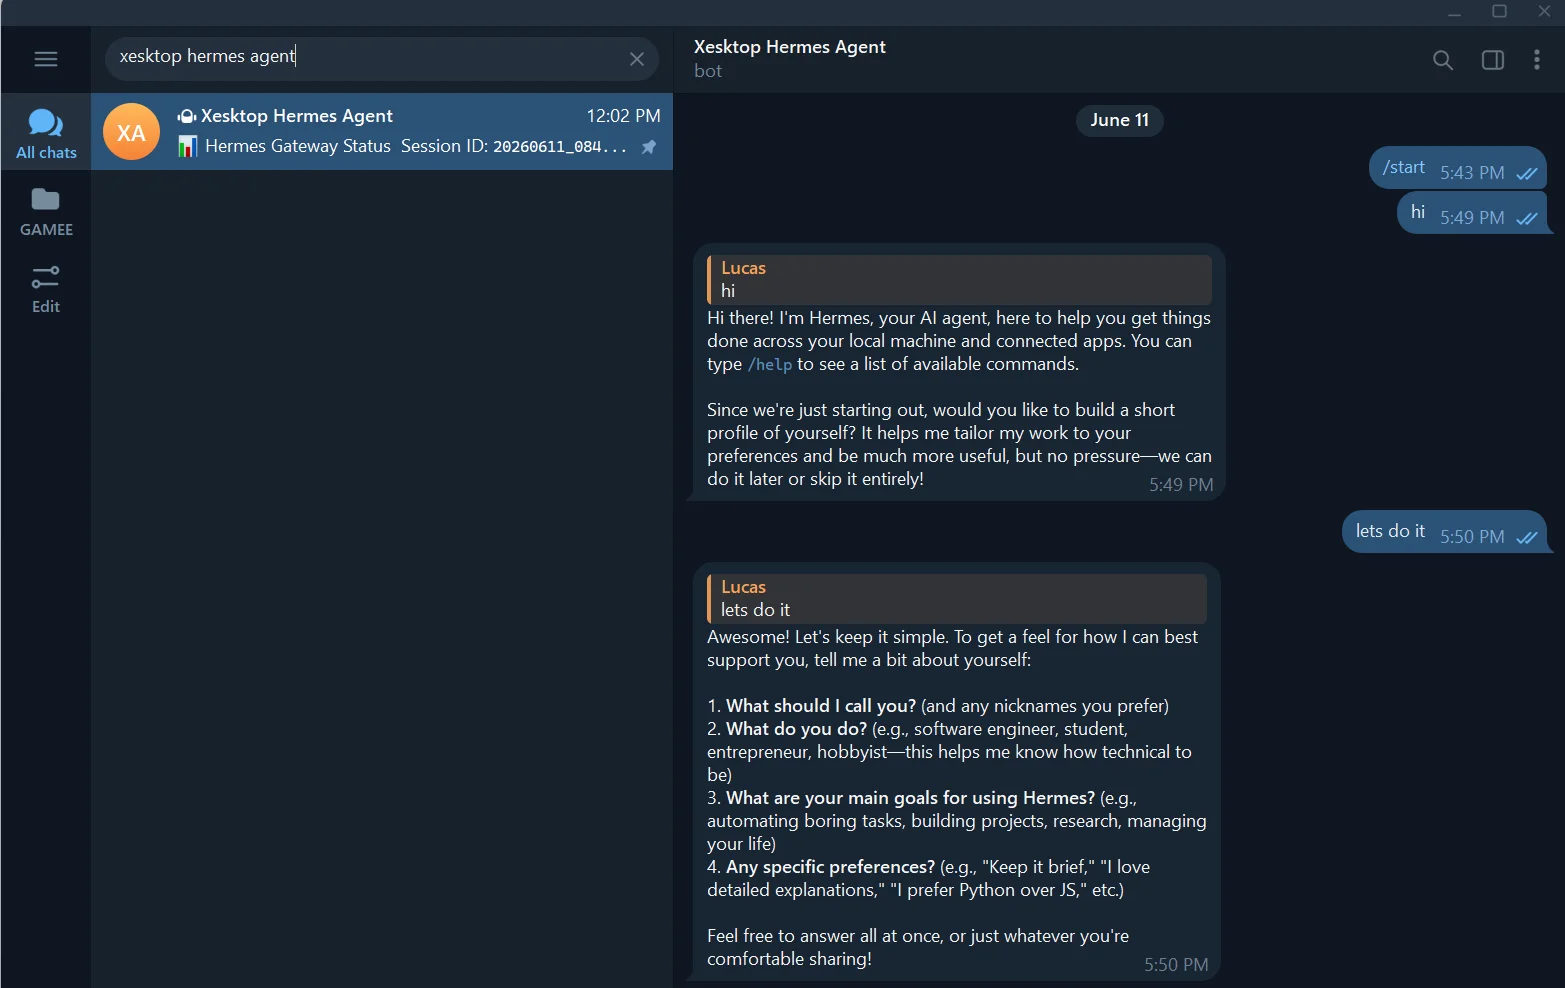
We can now talk to our agent via Telegram:
7. Alternative access UIs
We can access Hermes through different UIs. I’ve tried them all and personally like terminal experience, but it’s up to you to choose what’s best for you. I’ll show you how to configure the Hermes Desktop app.
Also, as an alternative we can access the GPU inference directly in our code editor or agent harness such as OpenCode.
Hermes Desktop app
Hermes has its own desktop application, and what’s cool is that we can use it on our local machine while the agent backend and the inference happen on the remote machine.
First, we need to make sure the Hermes web server is running on the remote machine and is accessible from outside since that’s how the desktop app connects to it. The command below launches the web dashboard server.
PowerShell
hermes dashboard --host 0.0.0.0 --port 9119 --insecure --tui --no-open --skip-build
You can open the dashboard in the browser by going to localhost:9119.
–insecure flag means the dashboard doesn’t force you through the login page. It doesn’t mean the access is insecure because we’ll use session access token instead.
Let’s create a token by running this command:
PowerShell
python -c "import secrets,base64;
print(base64.b64encode(secrets.token_bytes(32)).decode())"

Bash
openssl rand -base64 32
We need to save the token in C:\Users\USERPROFILE\AppData\Local\hermes\.env as:
HERMES_DASHBOARD_SESSION_TOKEN=<your token her>
Now back to our local machine, let’s install Hermes Desktop and then launch it.
We can download the installer from the website or run this command to install it just like we did earlier on the remote machine. It’s the same Hermes Agent. The only difference is that here we’ll launch the desktop app as our primary UI.
PowerShell
irm https://hermes-agent.nousresearch.com/install.ps1 | iex

Bash
curl -fsSL https://hermes-agent.nousresearch.com/install.sh | bash
Let’s start the desktop app by running `hermes desktop` in the command line.
Then go to Settings > Gateway and paste your remote server URL and the session token.
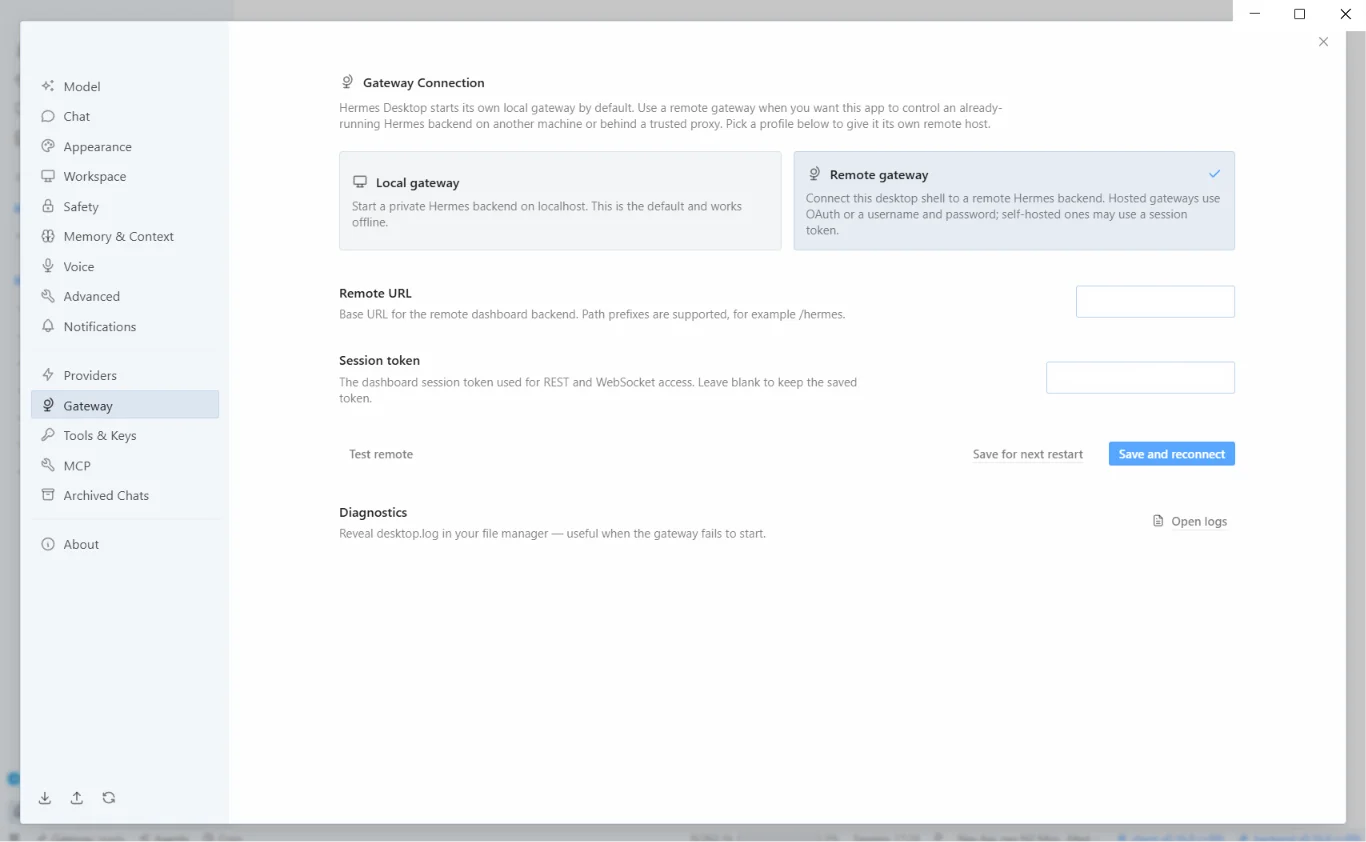
Gateway settings in Hermes Desktop – remote server URL “http://REMOTE.SERVER.IP:9119”
After saving and reconnecting, we’ll be able to use the desktop app with the agent installed on the remote machine.
Zed (IDE)
In the IDE of your choice, you should be able to add a custom OpenAI API compatible LLM Provider. In my favorite IDE – Zed, I added our LM Studio as a provider.
We need API URL (this is the same URL we have used earlier to test the LM Studio server connection: http://REMOTE.SERVER.IP:1234/v1), API key (i.e. “dummy-key”), and the models you have downloaded and want to use (i.e. qwen/qwen3.6-27b, google/gemma-4-31b etc.).
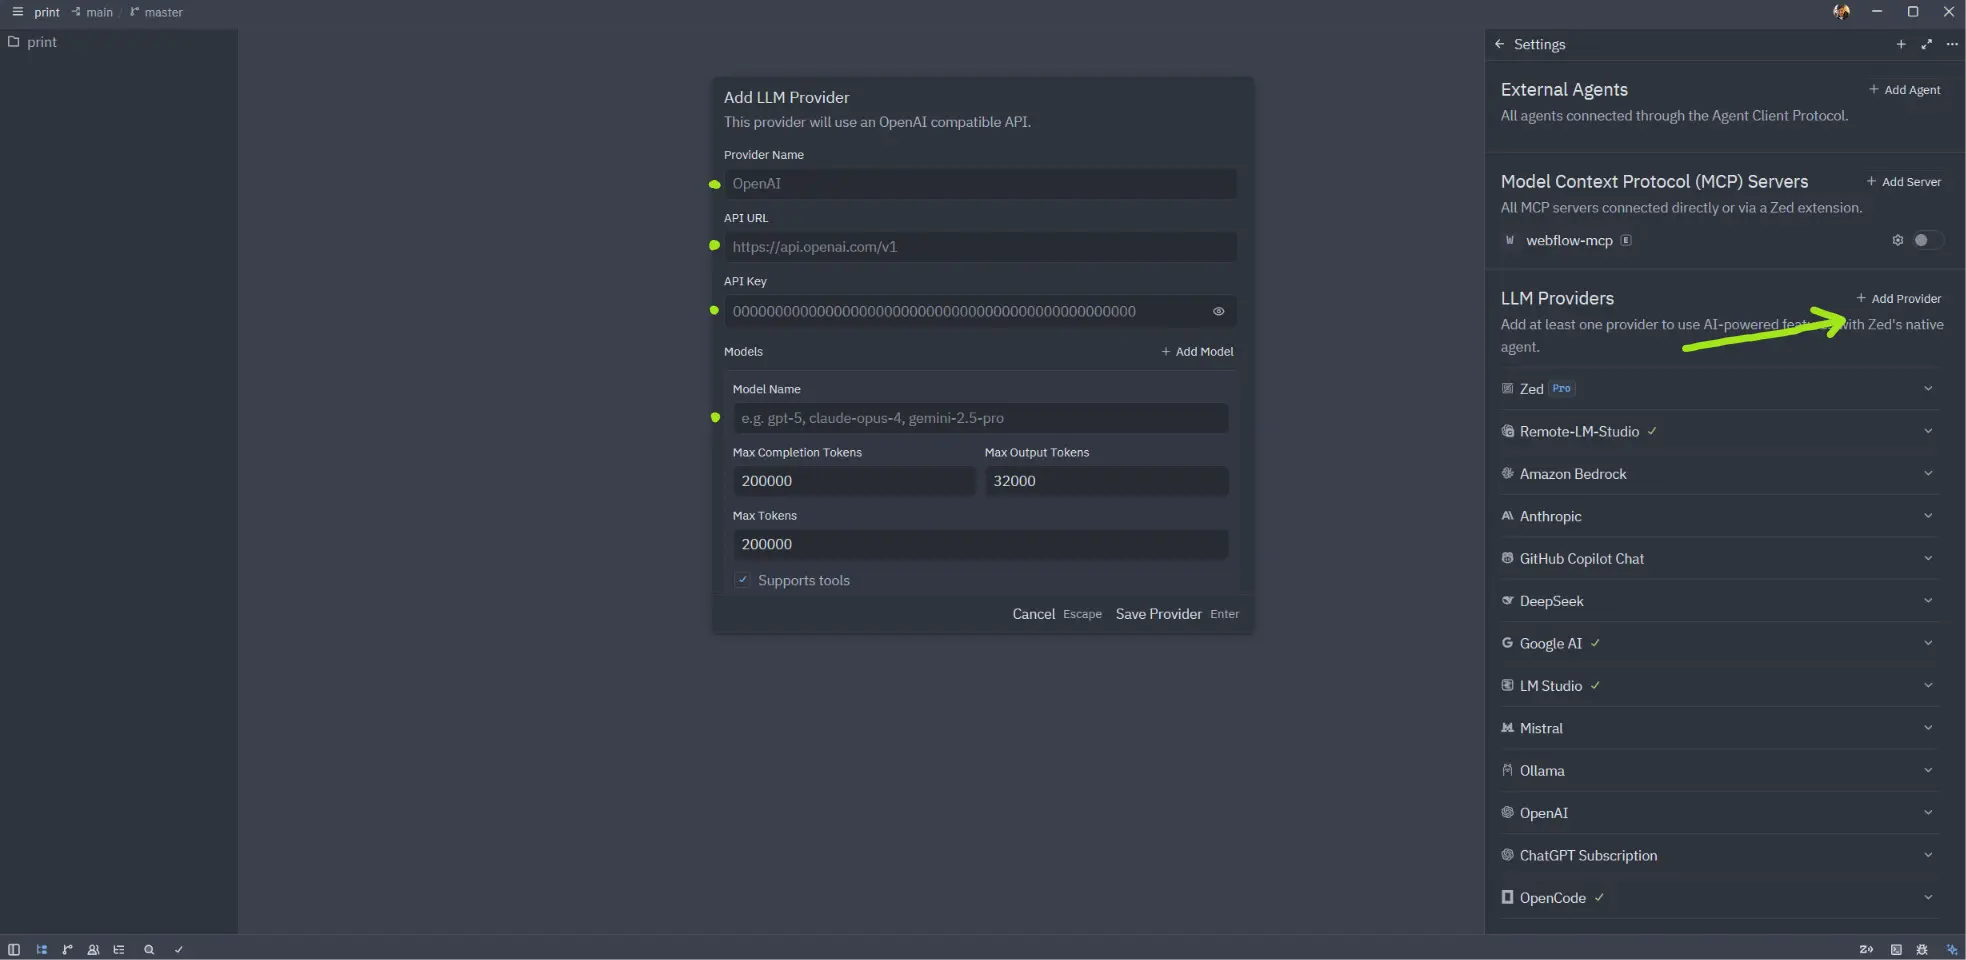
Add a custom model provider in Zed
OpenCode
Adding a custom provider to OpenCode is a breeze. Let’s locate the config file and then add LM Studio remote.
Path to config: .config\opencode\opencode.jsonc

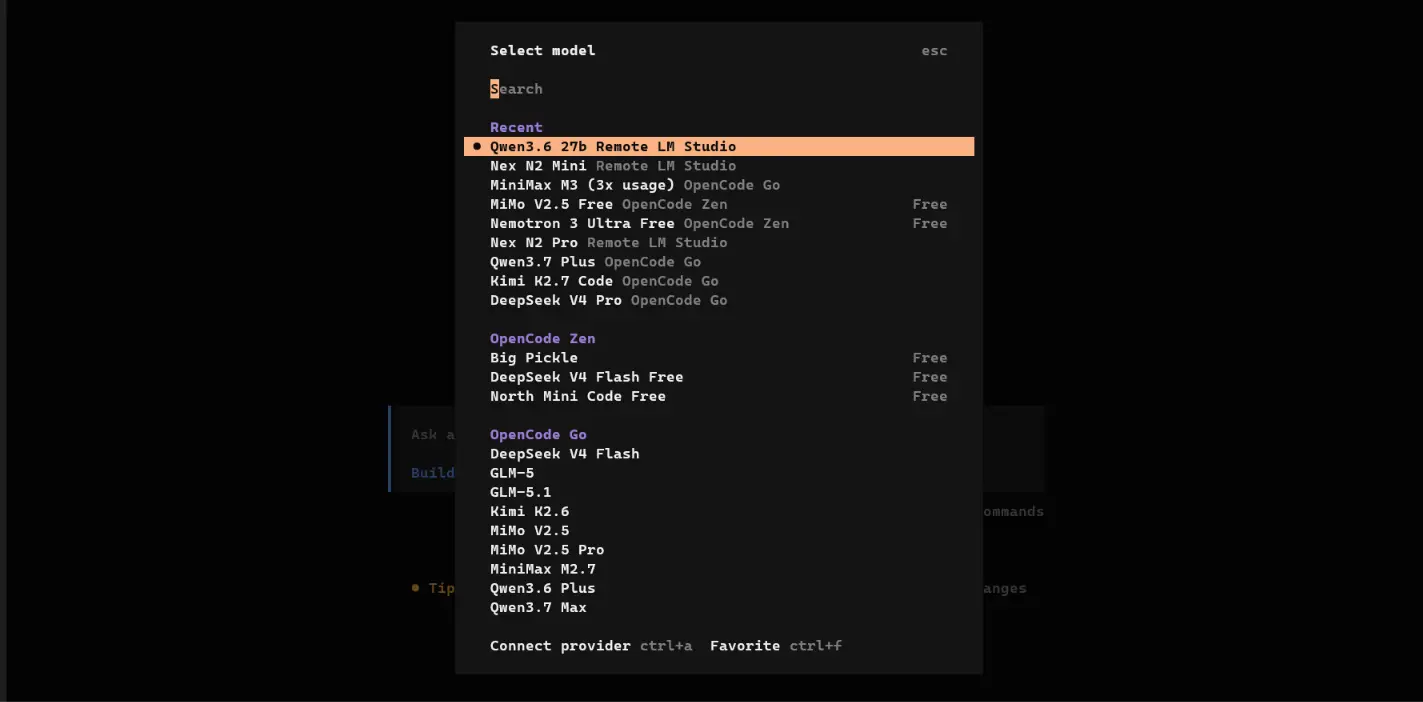
After that, let’s restart OpenCode and user the “/models” command to select our newly added provider. We can now use our remote model locally to code.
Final thoughts
You’ve successfully built a fully private AI coding environment. You’ve bypassed the constraints of proprietary platforms and kept your data where it belongs – with you.
While this setup is a powerful starting point, it’s also a good place for experimentation. I encourage you to swap in new models, test different agentic workflows, and tweak the setup as your needs evolve. The landscape of local AI moves fast, and you now have the foundation to stay at the cutting edge without ever having to compromise your privacy.
Use this setup to push your projects further and keep exploring!
Resources
- Hermes Agent documentation https://hermes-agent.nousresearch.com/docs/
- LM Studio documentation https://lmstudio.ai/docs/app
—
Lucas


