

Key takeaways
- The global AI video generator market was valued at $788.5 million in 2025 and is estimated to reach $946.4 million in 2026 (Grand View Research).
- Cloud based platforms accounted for 51.2 percent of global AI video market revenue in 2025 (Grand View Research).
- A 3D playblast gives you direct control over animation, timing, composition, and camera movement before AI generation begins.
- ComfyUI workflows built around models such as LTX-2.3 or MiniMax H3 can use motion and structural information from a 3D playblast while applying a different visual style.
- The workflow makes it easier to change the look of a shot without rebuilding the animation every time.
TL;DR
Pure AI video generation can produce impressive results, but getting an exact performance, camera move, or composition can still involve a lot of trial and error. A hybrid workflow gives you more control by starting with a simple 3D playblast that already contains the animation and camera direction you want. That playblast can then guide a ComfyUI video workflow while a reference image and prompt establish the final visual style. The result is a workflow where 3D controls the movement and AI handles much of the visual transformation.
What if AI did not have to invent the entire video?
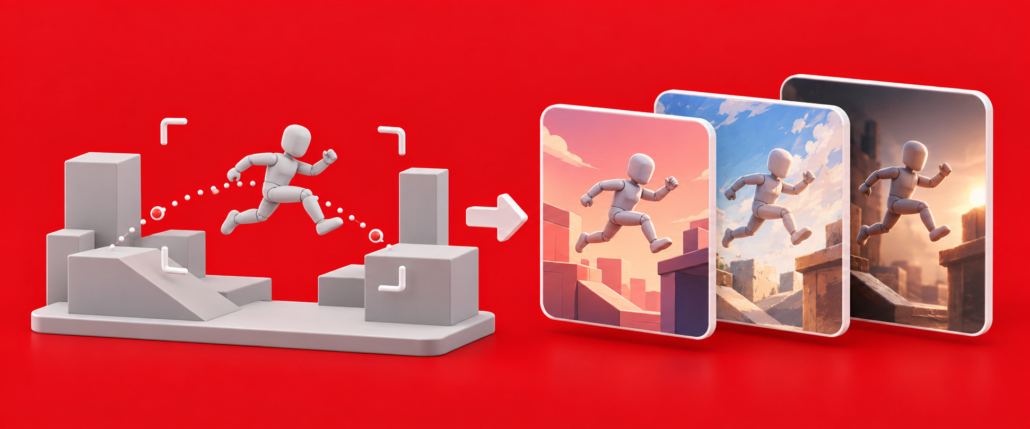
Nowadays, it’s easy to generate a video with AI with a simple image or text input and for the AI generator to do all the work. But what if we wanted more direction? Imagine starting with a basic gray 3D character jumping through an unfinished scene. There are no polished materials, detailed lighting, complex shaders, or final environment assets. The animation and camera movement are there, but visually, it still looks like a rough blockout.
Now take that same movement and transform it into a stylized cinematic shot, anime sequence, painted animation, or realistic scene using AI. The final result may look completely different from the original playblast, but the movement underneath it came from something you deliberately animated.
That is the basic idea behind this workflow. Instead of asking an AI video model to decide everything at once, you give it a shot that has already been directed.
The problem with generating everything through AI
AI video tools are becoming a much bigger part of content production. The global AI video generator market was valued at $788.5 million in 2025 and is estimated to reach $946.4 million in 2026 (Grand View Research). The technology is developing quickly, but creative control can still become difficult when you need something very specific.
You might ask for a character to jump while the camera moves around them, only to get the right jump with the wrong camera. Change the prompt and the camera might improve while the character performs a different movement. Repeating that process can become frustrating when you already know exactly what the shot should do.
Prompting is less precise than direct animation
Prompts are useful for describing an idea, mood, style, or general action. They become less convenient when you are trying to control exact poses, timing, framing, and choreography. If a character needs to reach the highest point of a jump at a particular moment, adjusting animation curves gives you much more direct control than rewriting a sentence and generating another variation.
Specific camera movement can be difficult to repeat
The same issue applies to the camera. You may want a controlled orbit, a particular framing change, or a camera that follows the character through a complex movement. Building that camera in 3D gives you a visual way to adjust it until it works rather than hoping the next generation interprets the prompt correctly.
The idea is to let 3D direct the AI
The workflow becomes easier to understand when the responsibilities are separated. 3D can handle the parts where precision matters most such as:
- Character animation
- Poses and timing
- Camera movement
- Framing
- Composition
- Object placement
- Basic spatial relationships
AI can then focus on visual interpretation, including character appearance, materials, lighting, environmental detail, and the overall art style. This gives you a controlled foundation while still leaving room for AI to transform the shot dramatically.
Step 1: Create the 3D playblast
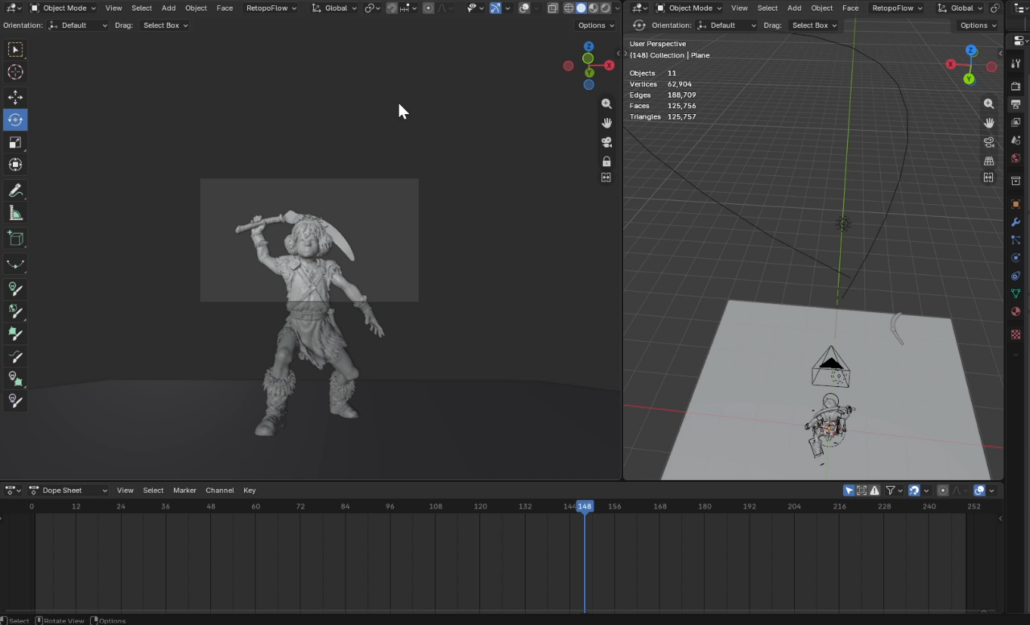
Start by creating the shot in your preferred 3D software. Blender, Maya, Cinema 4D, Houdini, 3ds Max, or another animation package can all serve the same basic purpose here. At this point, focus on the motion rather than final rendering.
- Use models that match the type of control you need – How simple the blockout can be depends on the workflow. If the AI generation is driven by depth or normal maps, the output will tend to preserve the shape and proportions of the source model quite closely.
- For example, using an Unreal Engine mannequin as the blockout could result in an anime-style character that still retains the mannequin’s proportions. In that case, the model should already have a shape and silhouette reasonably close to the intended result. With models such as MiniMax, however, you can instruct the system to focus primarily on the motion, giving it more freedom to reinterpret the character’s appearance and proportions.
- Animate the performance – This is where much of the creative control comes from. You can adjust the poses, spacing, speed, timing, and interactions until the movement behaves the way you want. For a jump, for example, you can control the anticipation, takeoff, pose in the air, landing, and recovery directly rather than asking the AI to reinterpret the entire action every time something looks wrong.
- Direct the camera – Build the camera move at the same time. Set the framing, focal length, camera position, and movement based on the shot you want. The resulting playblast becomes a form of direction for the AI video rather than just a rough preview.
Step 2: Decide what the final style should look like
Once the movement feels right, you need to decide what visual direction the final video should follow. A strong reference image can help establish the character design, materials, lighting, colors, environment, and overall mood before processing the entire animation.
The reference might be concept art, an illustration, an AI generated image, a polished 3D render, or another approved visual. Think of this frame as your visual target. The playblast tells the workflow how things should move, while the reference helps describe how they should look. This separation makes experimentation much easier because you can keep the motion while changing the visual direction.
Step 3: Bring the playblast into ComfyUI
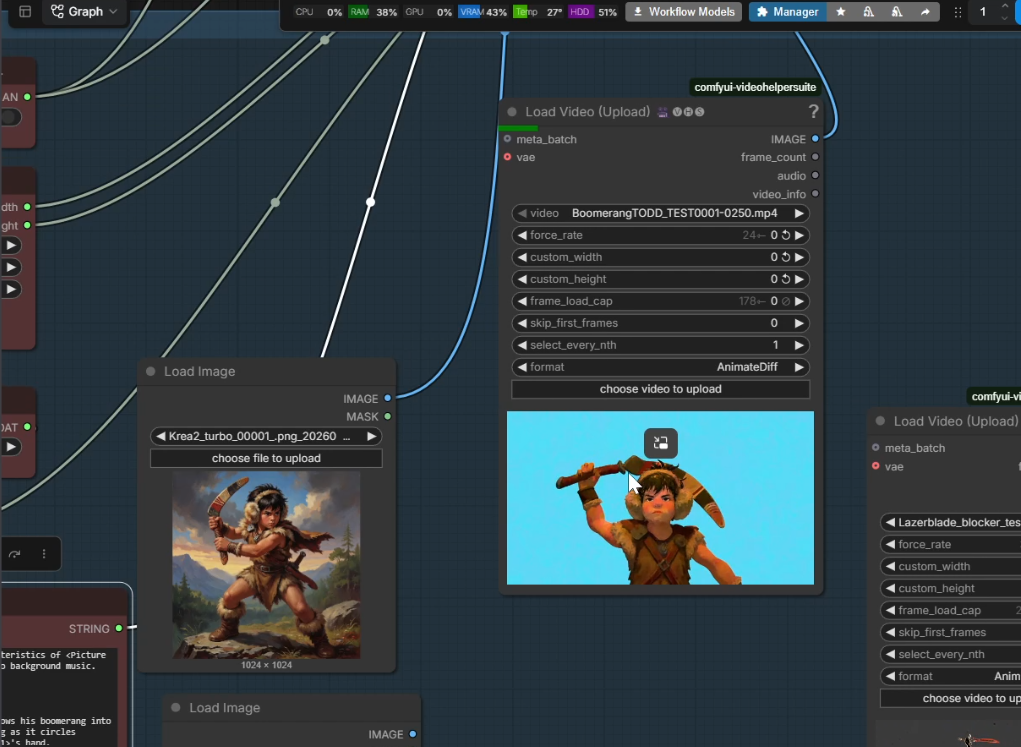
For this guide, we’ll be using ComfyUI, where the playblast and intended visual style come together. Its node-based structure makes it possible to combine video input, reference images, prompts, models, and different forms of structural control inside one workflow.
The important part is choosing a workflow that can actually extract and preserve useful information from the playblast. Two approaches that can be used for this are LTX-2.3 with IC-LoRA Union Control and MiniMax H3 with its Ref2VA architecture.
LTX-2.3 with IC-LoRA Union Control
With LTX-2.3, the playblast first needs to provide structural information through a depth or normal pass sequence. That sequence can then be passed into the LTXAddVideoICLoRAGuide node, where IC-LoRA Union Control injects the structural guidance into the model.
- A depth pass stores the distance of each pixel from the camera. It mainly tells the model where objects sit in 3D space, making it useful for preserving scene layout, camera movement, parallax, silhouettes, and general object placement.
- A normal pass stores the direction each surface is facing using RGB values. This gives the model more detailed information about surface orientation and internal geometry, making it useful when you need to preserve finer contours, slopes, muscle forms, or other geometric details as objects move and rotate.
Because these passes are tied closely to the source geometry, the resulting video will generally follow the proportions and structure of the original blockout more strictly.
MiniMax H3 with Ref2VA
MiniMax H3 can take a different approach. Instead of converting the playblast into depth or normal information first, the raw viewport playblast can be loaded directly into the motion input of the MiniMaxH3ReferenceToVideo node, such as video_1 or ref_video_0.
MiniMax can then analyze the video frame by frame and extract information such as camera movement, character poses, and timing directly from the playblast. This makes it useful when you want the AI to follow the original motion without necessarily forcing it to preserve the exact geometry of the 3D blockout.
Step 4: Combine the animation with the intended style
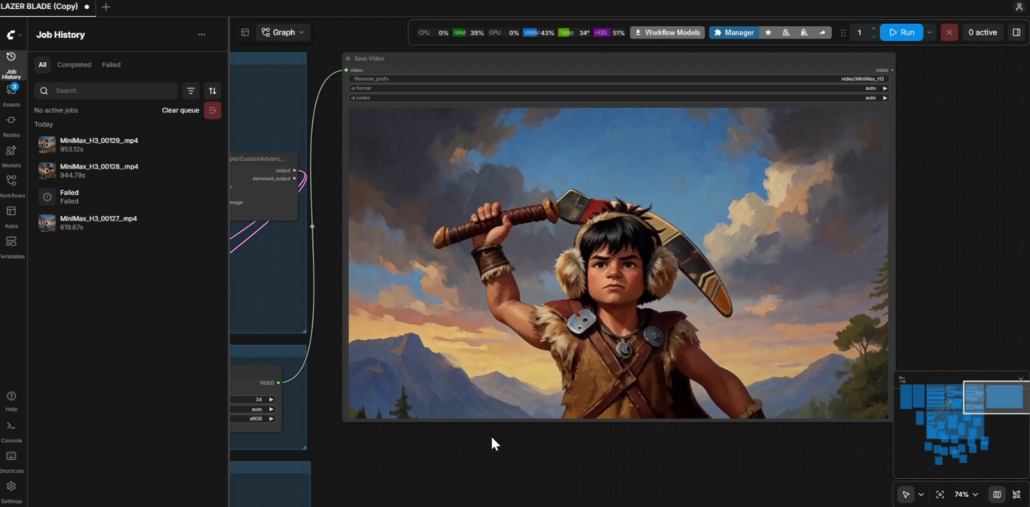
The workflow now combines several sources of direction. The playblast provides movement, camera motion, composition, and timing. Structural controls such as depth or normal passes can provide additional geometric guidance when using LTX-2.3, while MiniMax H3 can extract motion directly from the original playblast. The style reference provides the visual direction, and the prompt adds information about details, atmosphere, lighting, and the intended result.
A simplified version of the two workflows looks like this:
LTX-2.3:
3D playblast → depth or normal guidance → IC-LoRA structural control → style and prompt → AI video
MiniMax H3:
3D playblast → native motion extraction → style and prompt → AI video
The actual ComfyUI graph can contain many more nodes, but the main difference is how each workflow interprets the playblast. LTX-2.3 uses explicit structural information such as depth or surface normals, while MiniMax H3 can use the original video directly as a source of motion and spatial timing. You can check out an example of how the LTX 2.3 workflow looks like in this video:
Using a GPU provider for heavy AI generations
Video generation can place much heavier demands on GPU memory than a typical image generation workflow. Larger models, longer sequences, higher resolutions, and additional control stages can all increase the required computing resources.
Cloud based platforms already accounted for 51.2 percent of global AI video market revenue in 2025 (Grand View Research). For this particular workflow, GPU providers like Xesktop can act as the remote computer used to run ComfyUI when local hardware is not enough.
Step 5: Generate a small test first
Before generating the full shot, run a lower-resolution test to check how closely the AI follows the playblast or render pass and how well the reference image maps onto the motion. If the result is consistent and follows the intended structure and style, you can then increase the resolution for the final output.
You can also check whether the AI is respecting the major parts of the original animation. Look at the poses, silhouettes, camera movement, character design, environment, and general visual consistency. This also helps identify where a problem is coming from.
- If the motion is wrong – Review the playblast and the structural control being used. The model may not be receiving enough information about the movement you want to preserve.
- If the style is wrong – Look at the reference image, prompt, model choice, and style related settings instead.
Step 6: Refine the playblast based on the AI result
The first AI generation can reveal problems that were not obvious in the original playblast. Instead of only changing prompts or generation settings, go back to the 3D scene and adjust the part of the playblast that is causing the issue.
Treat this refining phase as a feedback loop between 3D and AI, so generate a test, identify what broke, make a targeted change to the playblast or control setup, then generate again. This gives you a much more direct way to solve problems than repeatedly changing the prompt or nodes without knowing what caused the issue.
If the movement becomes blurry or distorted
Stretch the keyframes in your 3D software to create a slower version of the shot, process that through the AI workflow, then speed the result back up in post-production.
If the camera movement is unstable
Simplify or smooth the camera animation. Sudden changes in direction, aggressive rotations, or very fast camera moves can make the generated scene harder to keep consistent.
If objects keep changing shape
For LTX-2.3, try using a camera-space normal pass instead of a raw viewport playblast. Normal data gives the model clearer information about surface orientation and internal contours, which can reduce warping or “swimming.” For important props, add slightly more geometry, enable ambient occlusion, or use high-contrast viewport materials so their boundaries are easier for the AI to follow.
If body parts disappear behind each other
Adjust the pose or camera so important limbs remain visible for more of the shot. With MiniMax H3, you can also provide a neutral reference image to reinforce the character’s anatomy while the playblast supplies the motion. If overlap is still causing problems, separating characters or props into isolated render passes can give the model cleaner silhouettes and reduce spatial confusion.
If the AI follows the playblast too closely
Simplify some of the visual information in the source or reduce the strength of the structural control. The playblast should guide the animation without forcing the final result to preserve every detail of the blockout.
What works particularly well with this AI workflow
The biggest advantage is predictability in areas where AI video can otherwise require repeated attempts.
- Animation stays intentional – The performance starts with something you deliberately created. If a pose needs adjustment, you can edit the animation rather than asking the model to guess again.
- Camera direction becomes easier – Camera movement can be designed visually inside the 3D scene, which makes more specific cinematography practical.
- Style iteration becomes faster – Once the playblast works, you can spend more of your experimentation on how the video looks rather than repeatedly trying to recreate the same motion.
- Motion and style can be reviewed separately – Animation problems can be fixed in 3D. Visual problems can be addressed during the AI stage. That separation makes the workflow easier to troubleshoot and art direct.
What AI still struggles with
The 3D base adds control, but the generated result can still break in certain situations. These limitations are worth testing early if the final shot includes complicated movement.
- Fast animation can smear details – Rapid movement can produce blurry regions, distorted shapes, or details that disappear temporarily between frames.
- Cloth and hair can behave unpredictably – The character’s main body might follow the original animation while loose clothing, hair, or other secondary motion changes in ways that were not present in the source.
- Particle effects can lose consistency – Smoke, debris, sparks, magic effects, and similar elements can be difficult to preserve exactly because their appearance changes rapidly from frame to frame.
- Occlusion can create new errors – When a hand moves behind the body or an object disappears behind another surface, the AI has to reconstruct information as it becomes visible again. That can introduce changes in details or shape.
Final thoughts

The most interesting part of this workflow is the combination of traditional control and newer generative tools. 3D animation gives you a reliable way to direct movement, timing, composition, and cameras. ComfyUI gives you a flexible way to explore what that controlled animation could look like in completely different visual styles.
The tools will continue to change, and AI video will keep getting more capable. What matters is how artists choose to use them. A strong animation, an intentional camera, a clear visual direction, and thoughtful creative decisions still shape the result. AI becomes another part of the toolkit, while the artist remains responsible for deciding what the shot is trying to achieve.